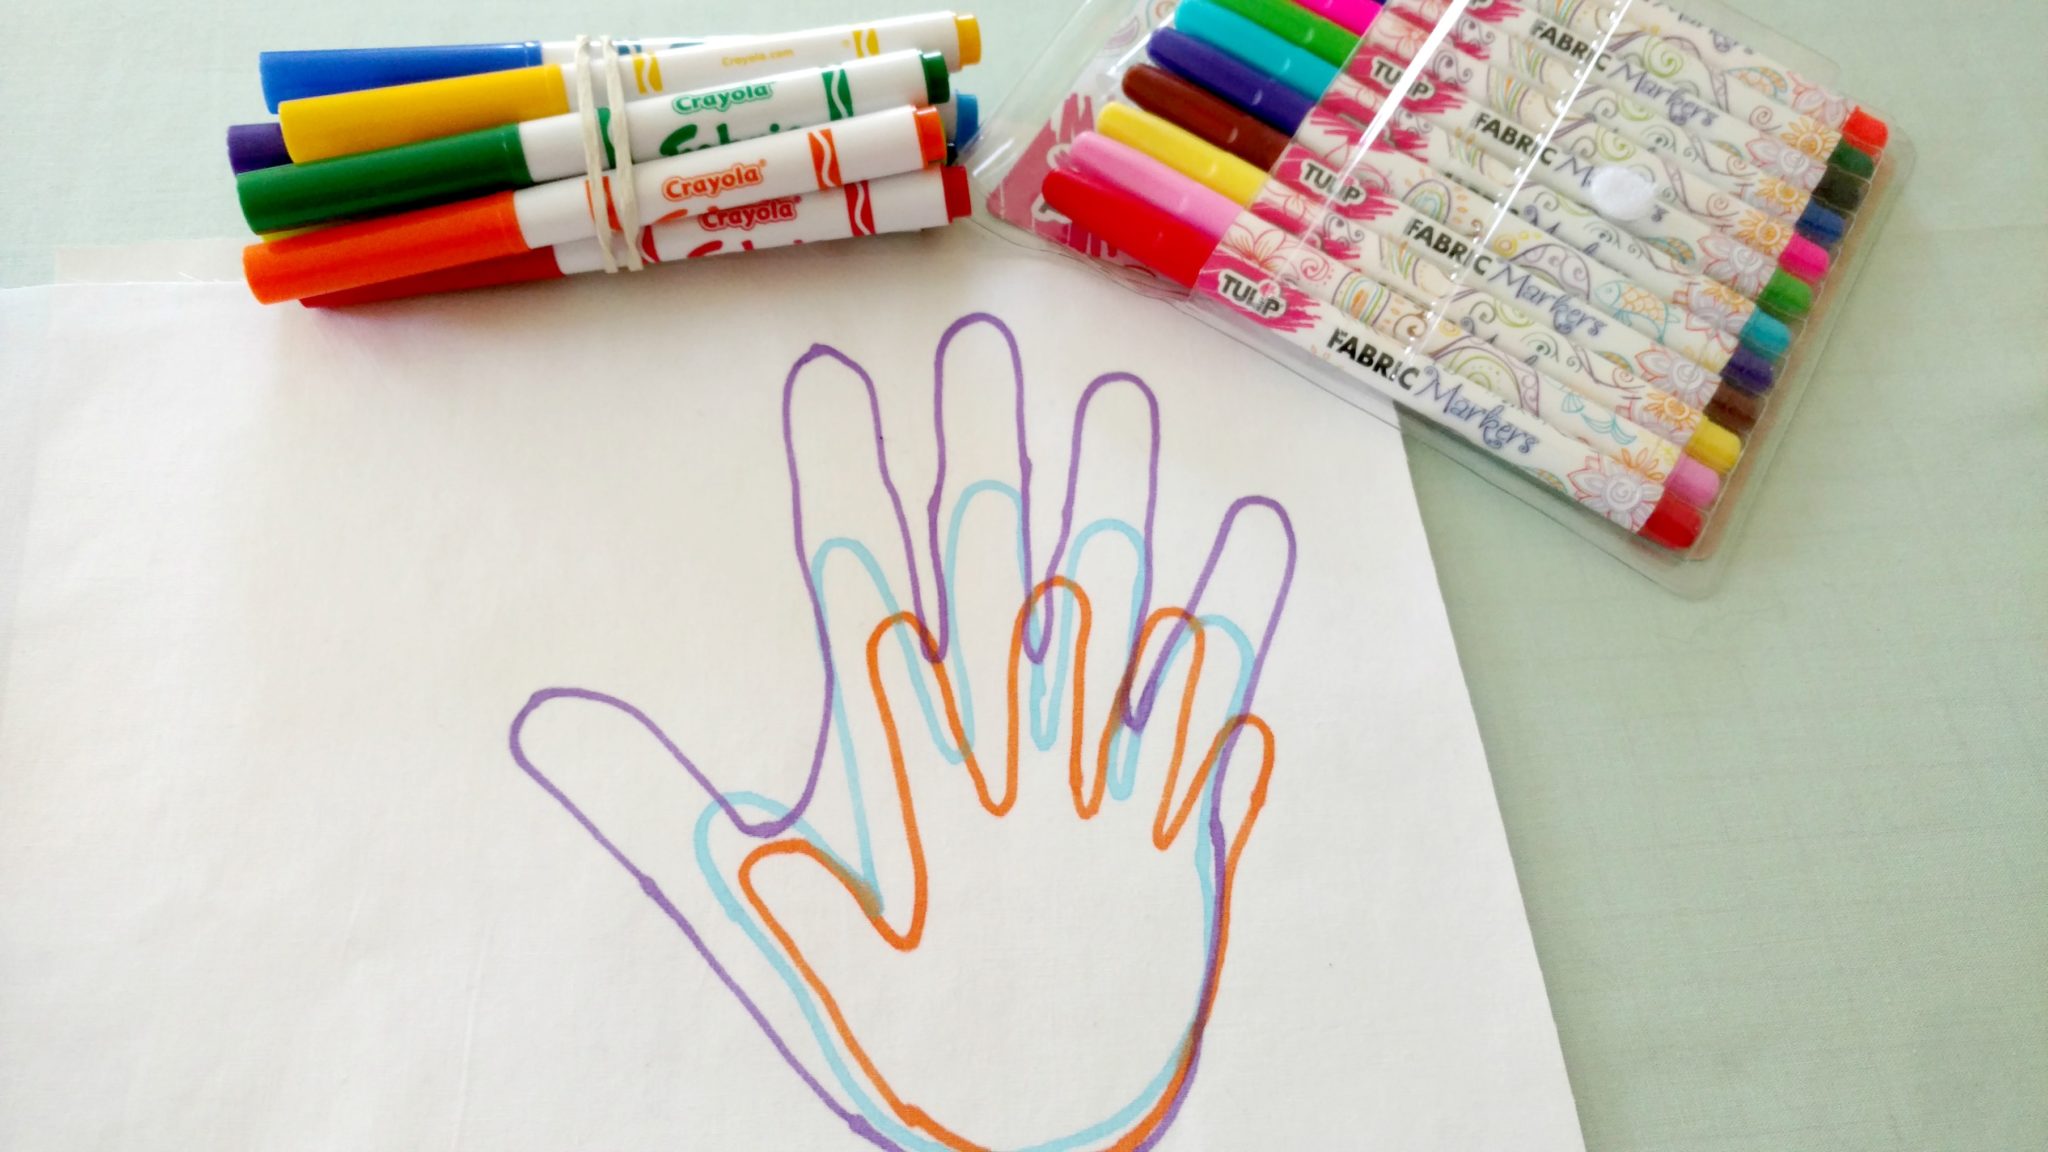
Vineyard Thimble

Embroidered & Personalized Gifts handmade in Glastonbury, CT

  • About Me
  • Contact Me
  • My Blog
  • Shop

Making Memories One Stitch at a Time

  • Original Designs
  • Home Decor
    • Embroidered Pillows
    • Linens & Tableware
    • Wall Decor & Framed Art
  • Occasions
    • New Baby
    • Birthdays
    • Religious
    • Graduation & College
  • Weddings
  • Gift Ideas
    • Babies
    • Personalized Cubbies
    • Tweens & Teens
    • New Home & House Warming
  • Apparel / Logo
    • Logo Wear
    • Sportswear Catalog
  • Seasonal

WATblock – using iron-on adhesive for no-sew project

February 24, 2017 By Paola


Materials needed: 

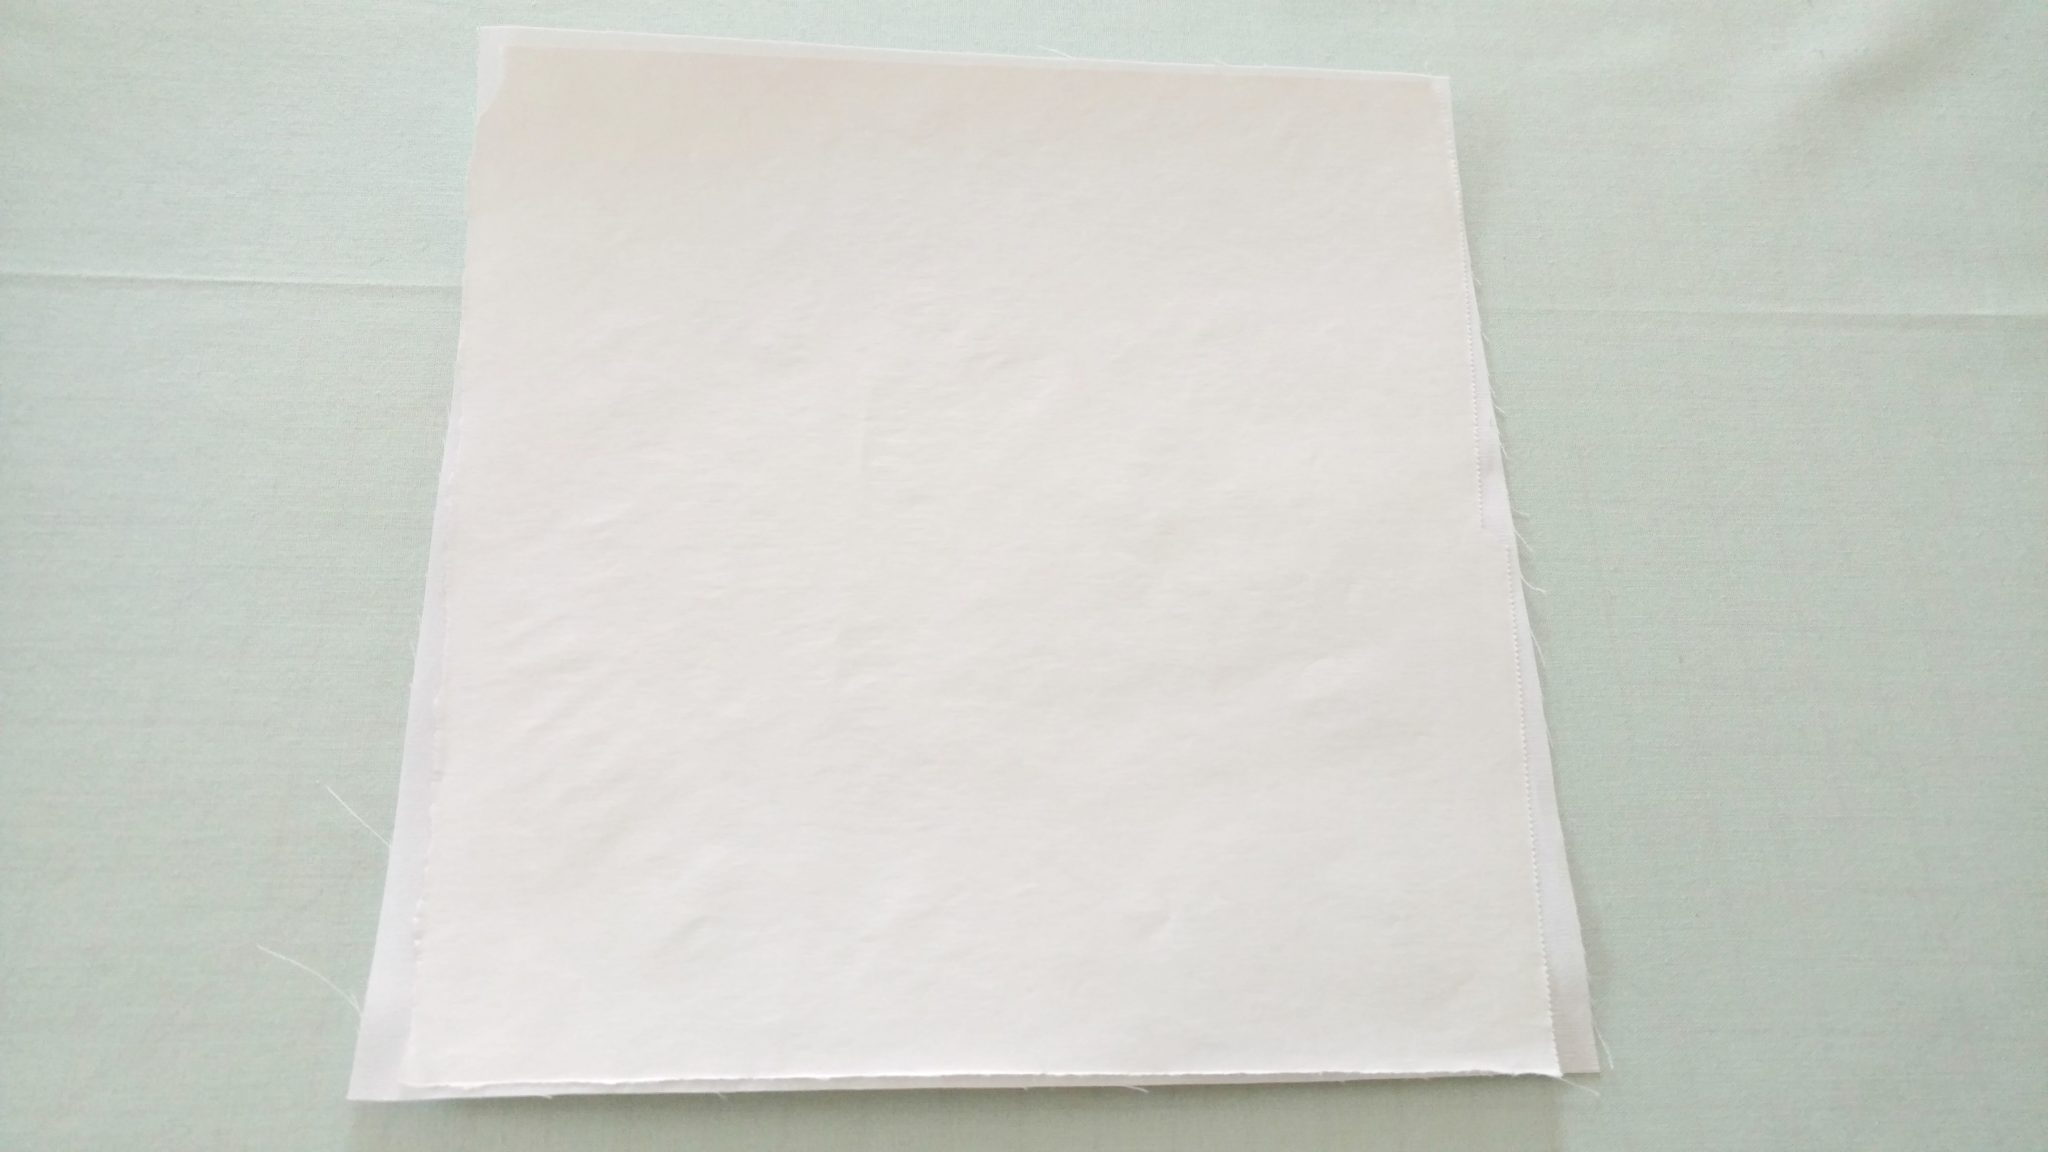
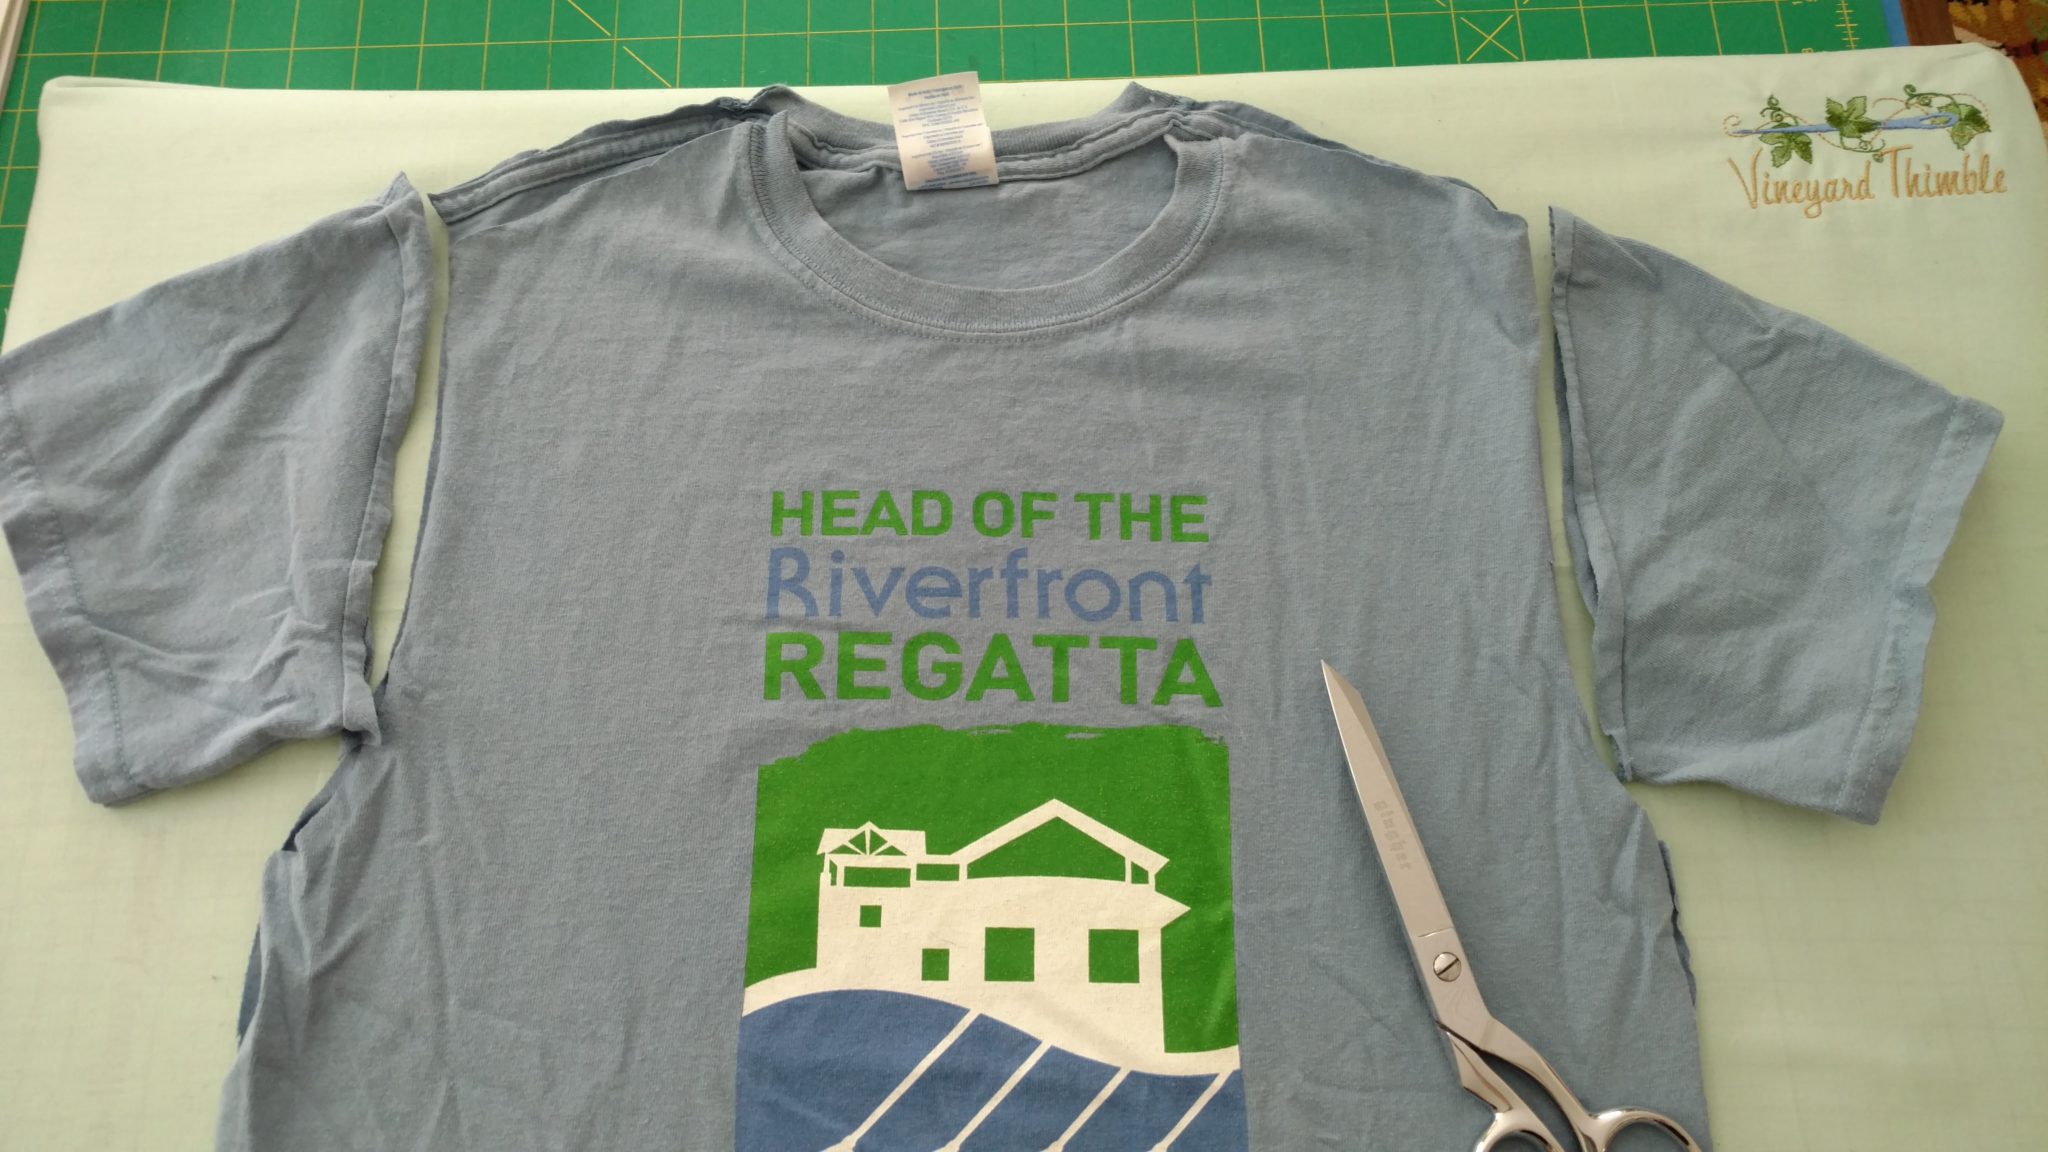
quilt block fabric (background fabric)

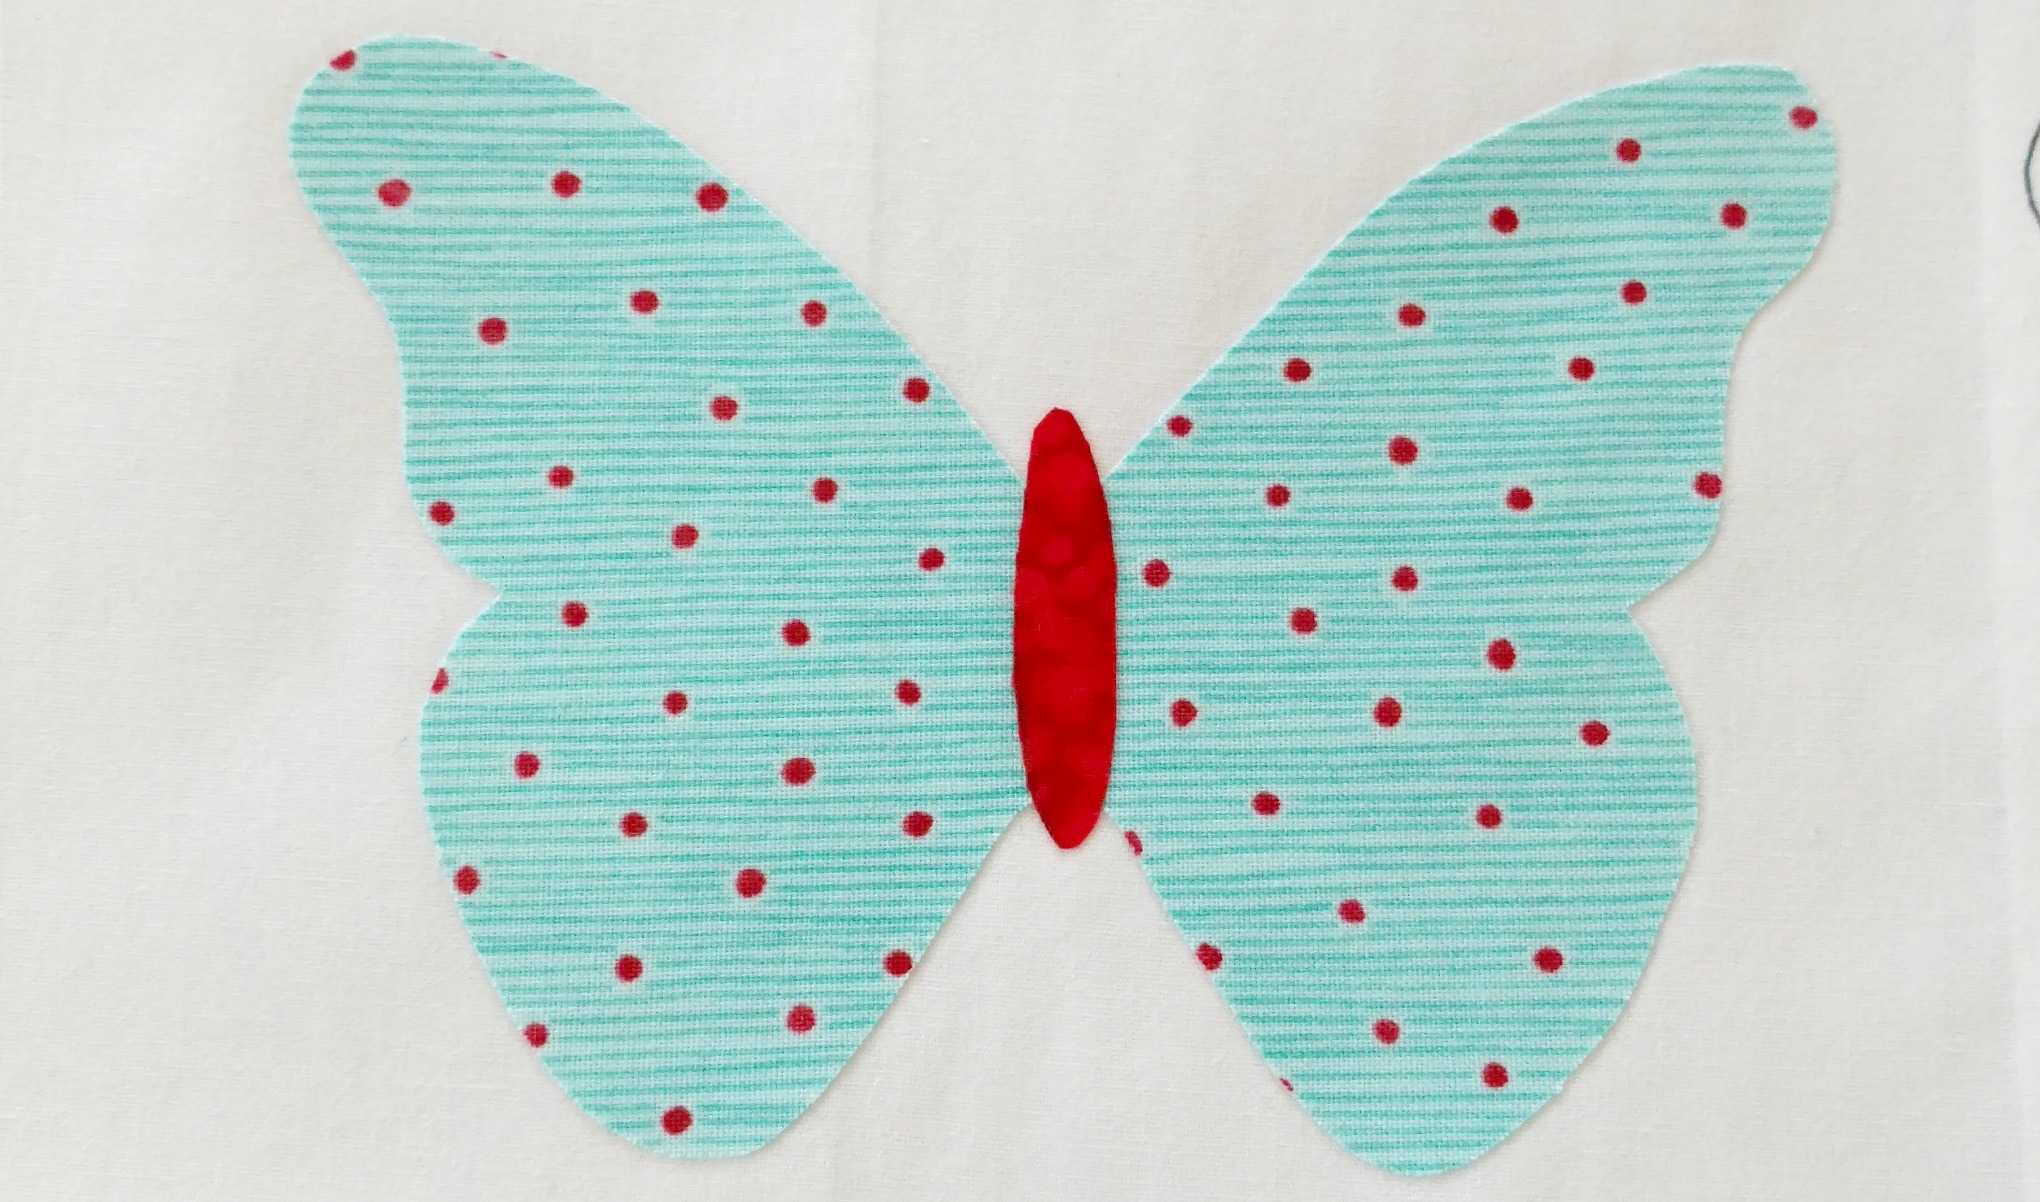
applique fabric (the blue and red in the photo)
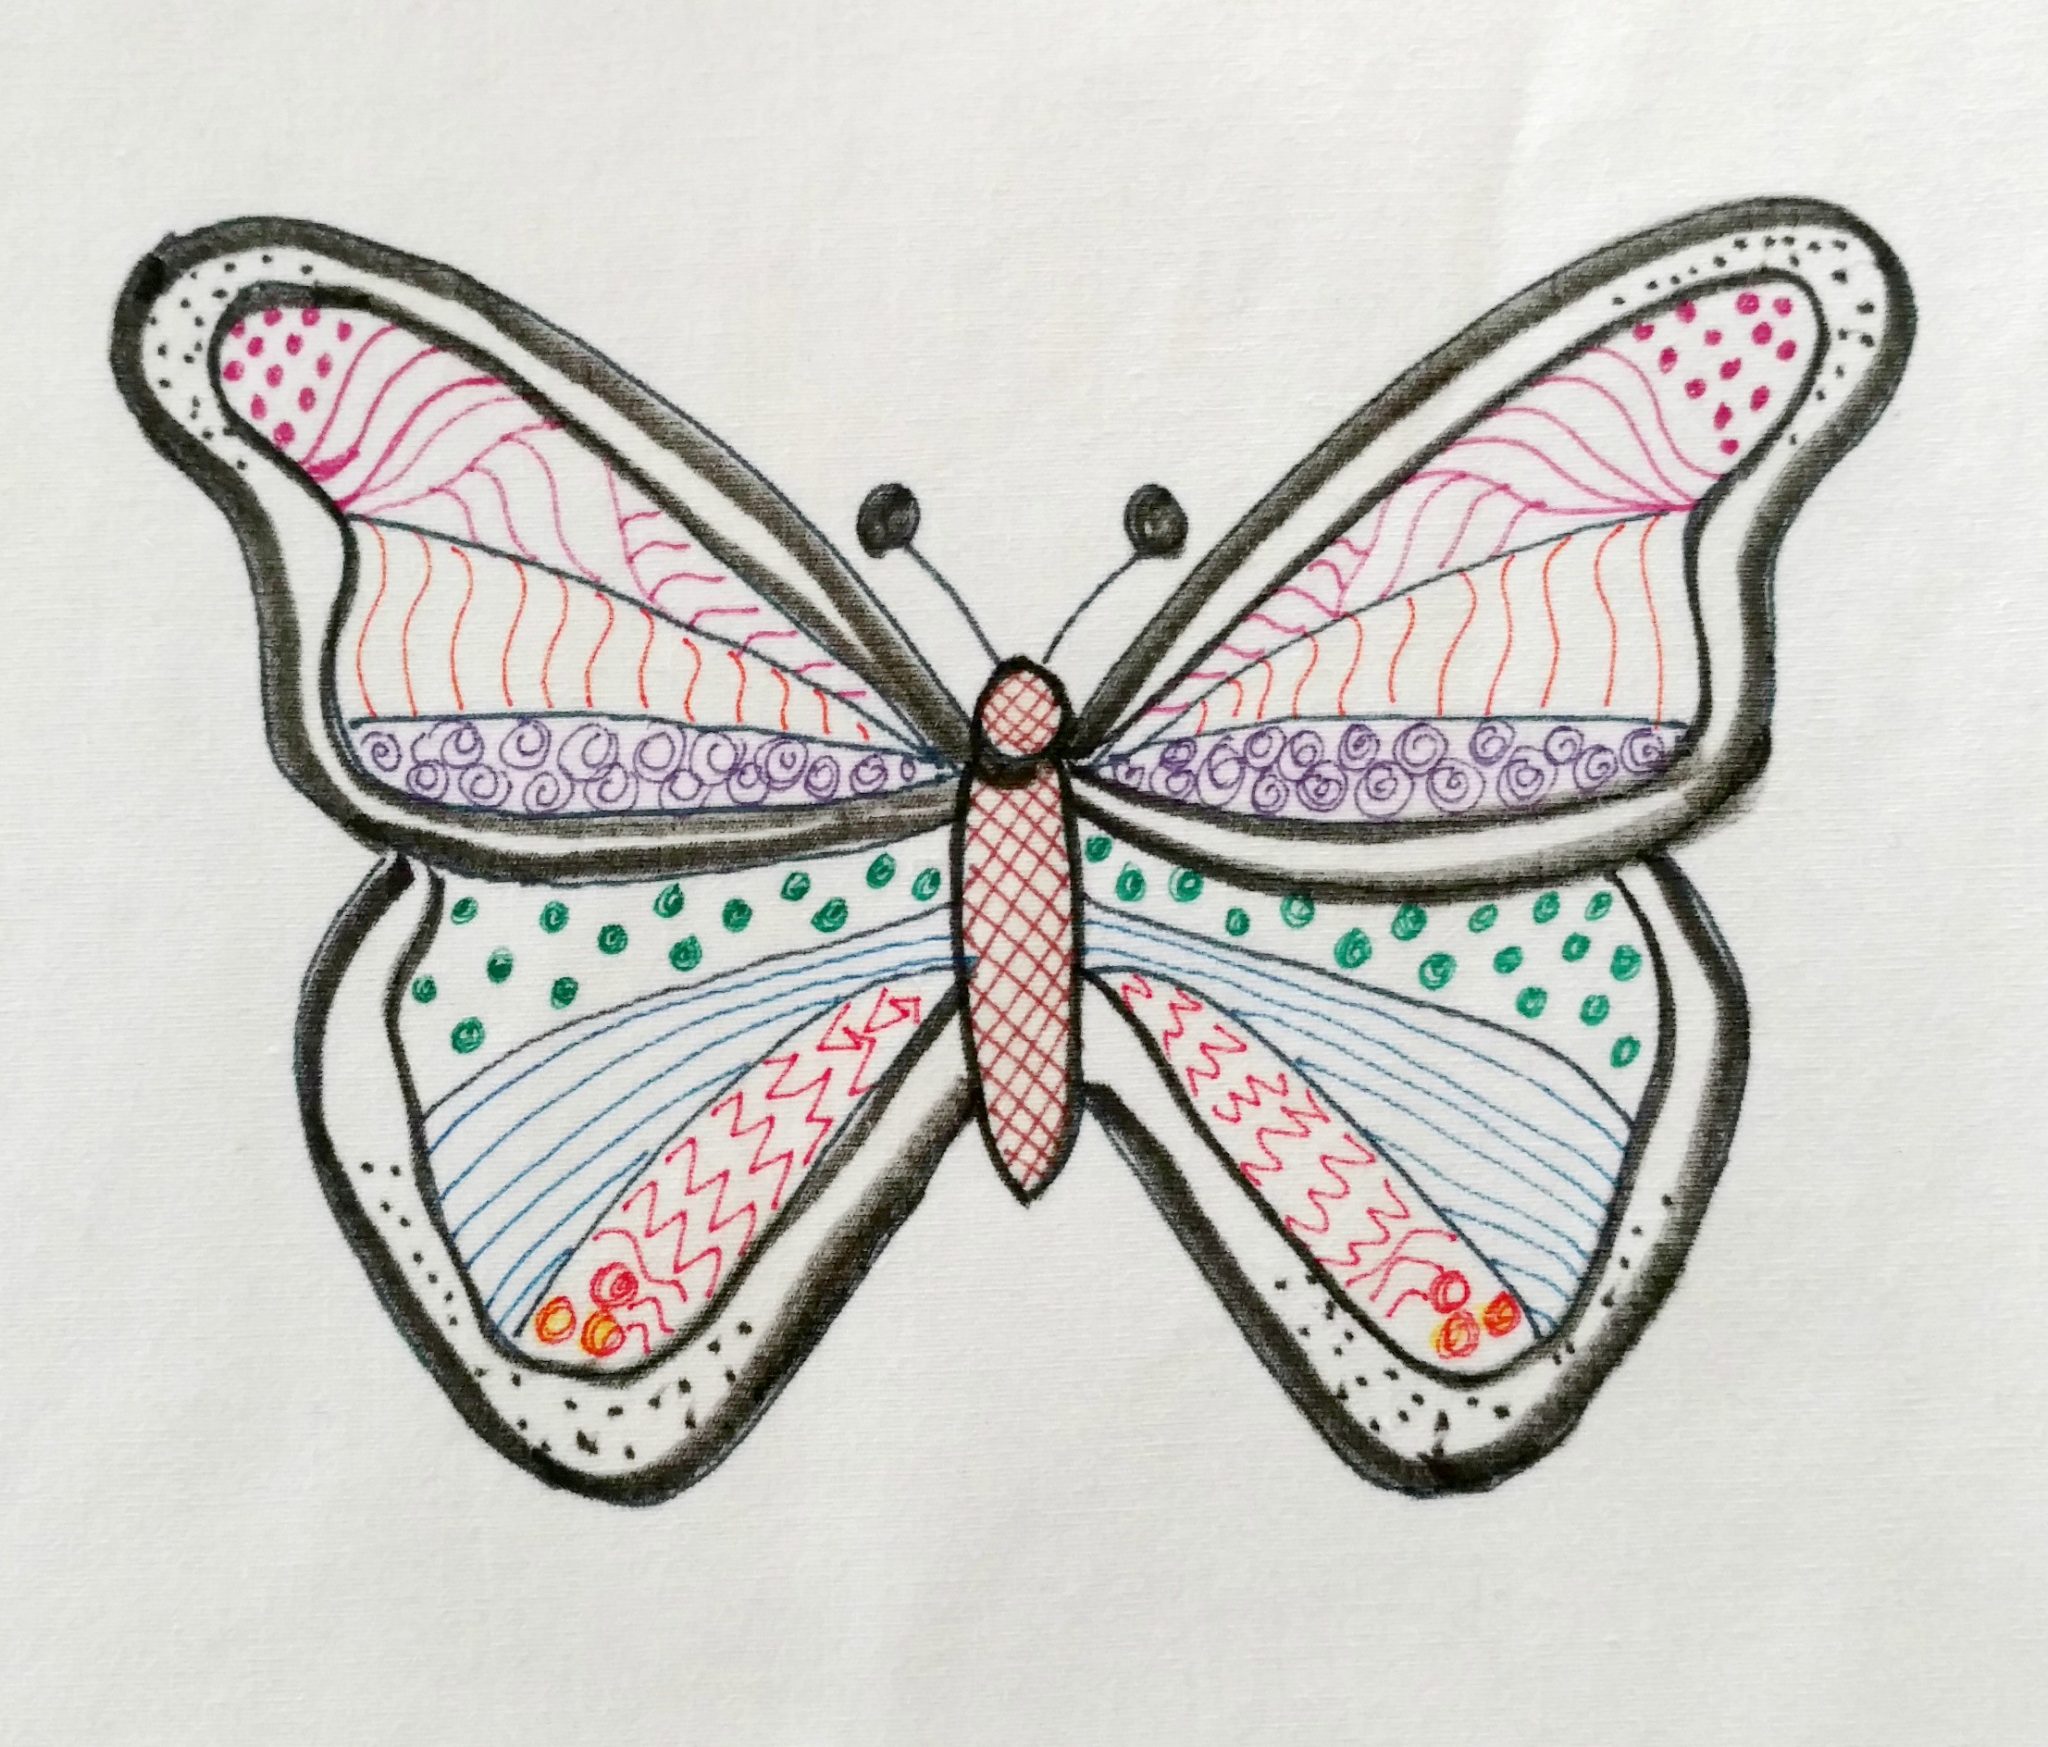
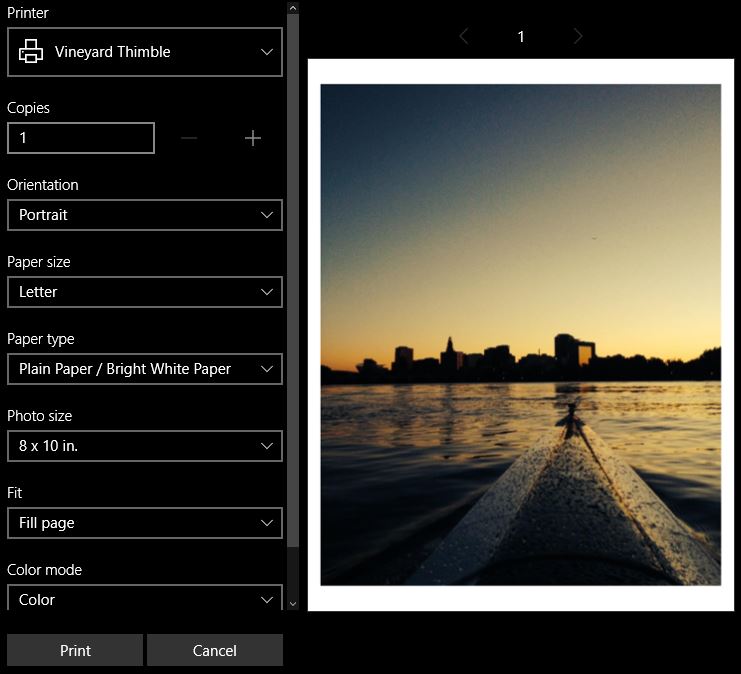
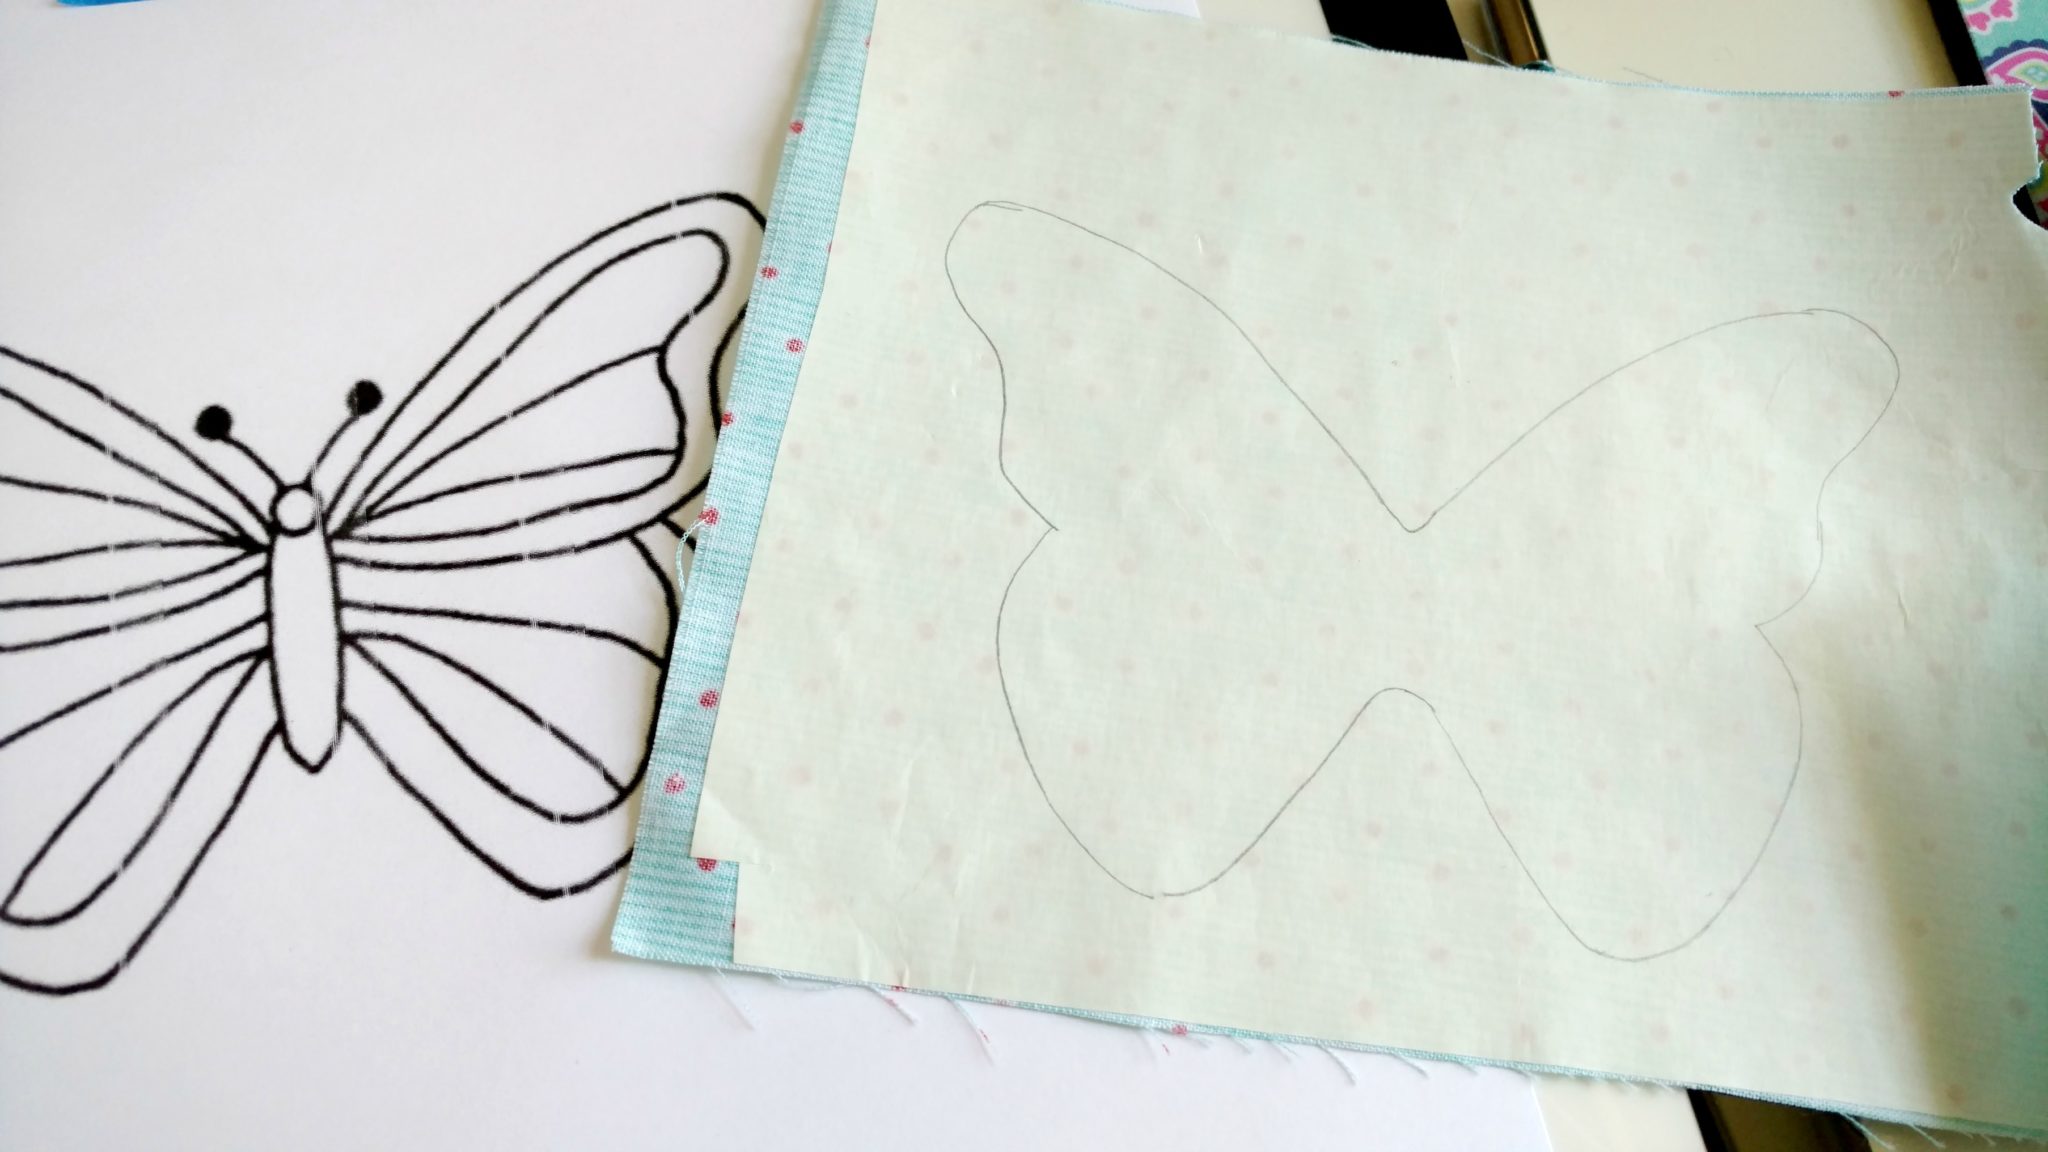
artwork

iron and ironing surface

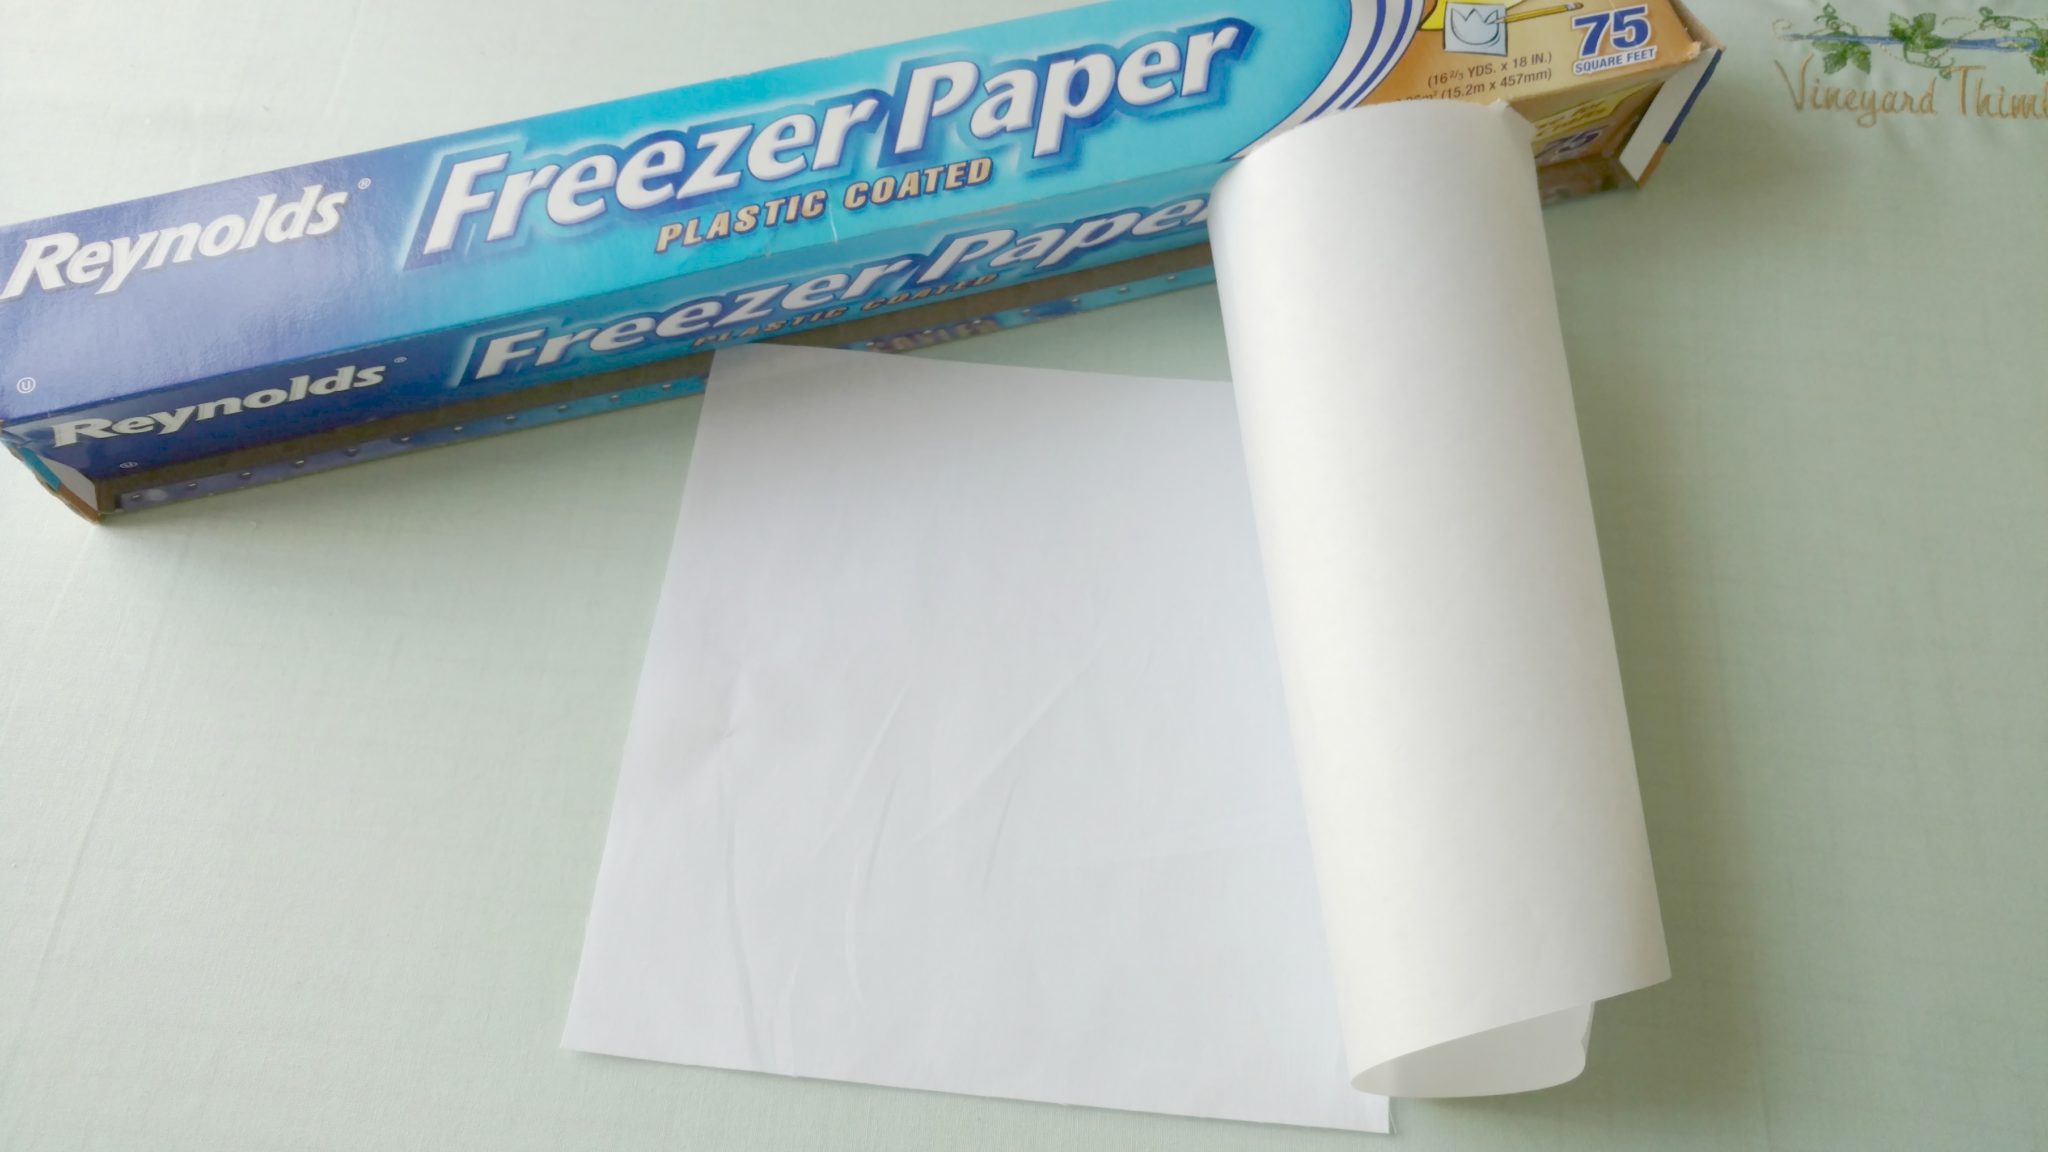
parchment paper (from the grocery store)

scissors

for NO SEW transfer  Heat-n-Bond Ultrahold iron-on adhesive.  This product allows for a permanent bond without the need for securing the edges with stitches.   Amazon affiliate link

for SEWING transfer  Heat-n-Bond Lite iron-on adhesive.  This product allows you to fuse the applique in place but will need to have the edges sewn in order to be permanent.   Amazon affiliate link

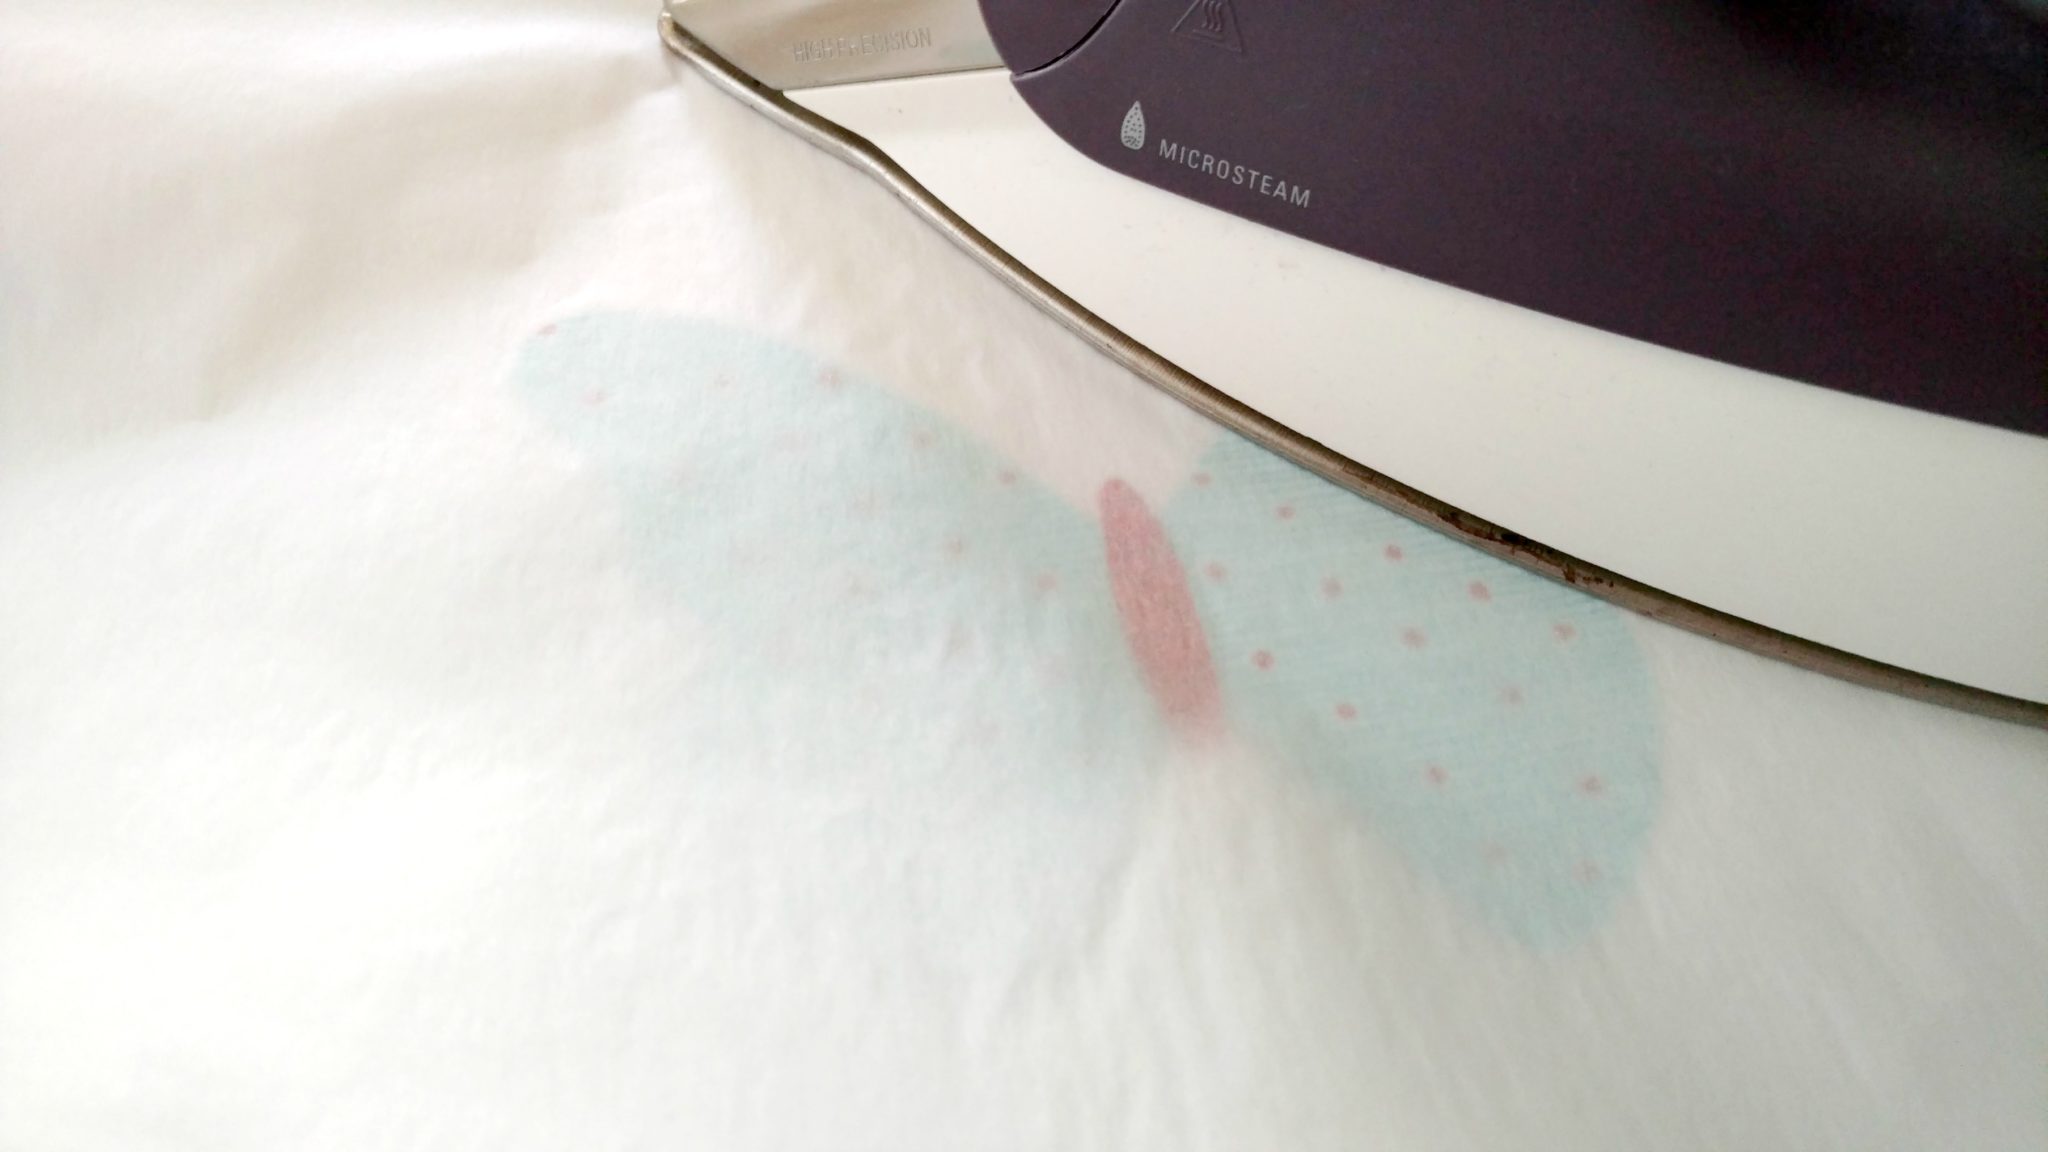
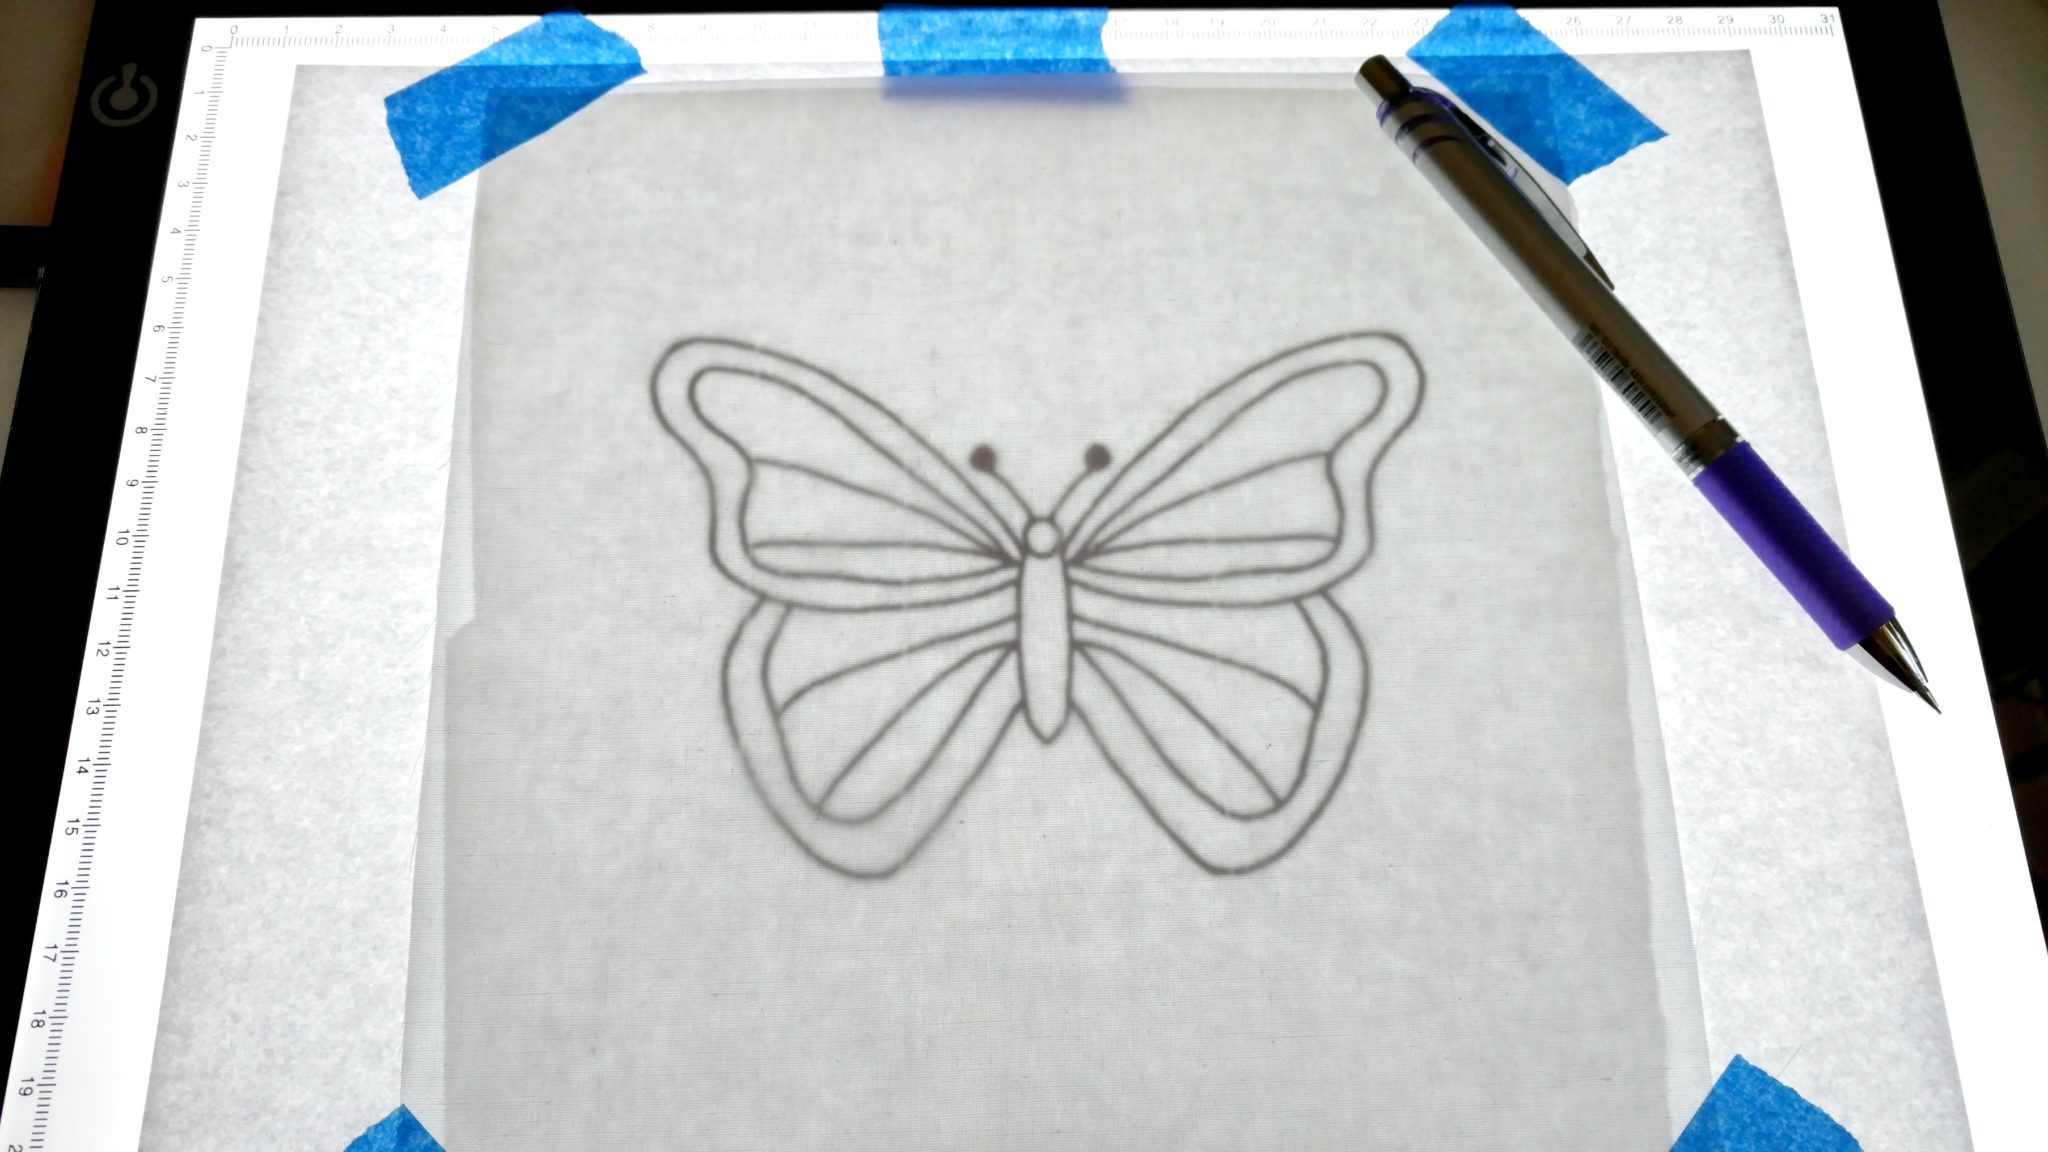
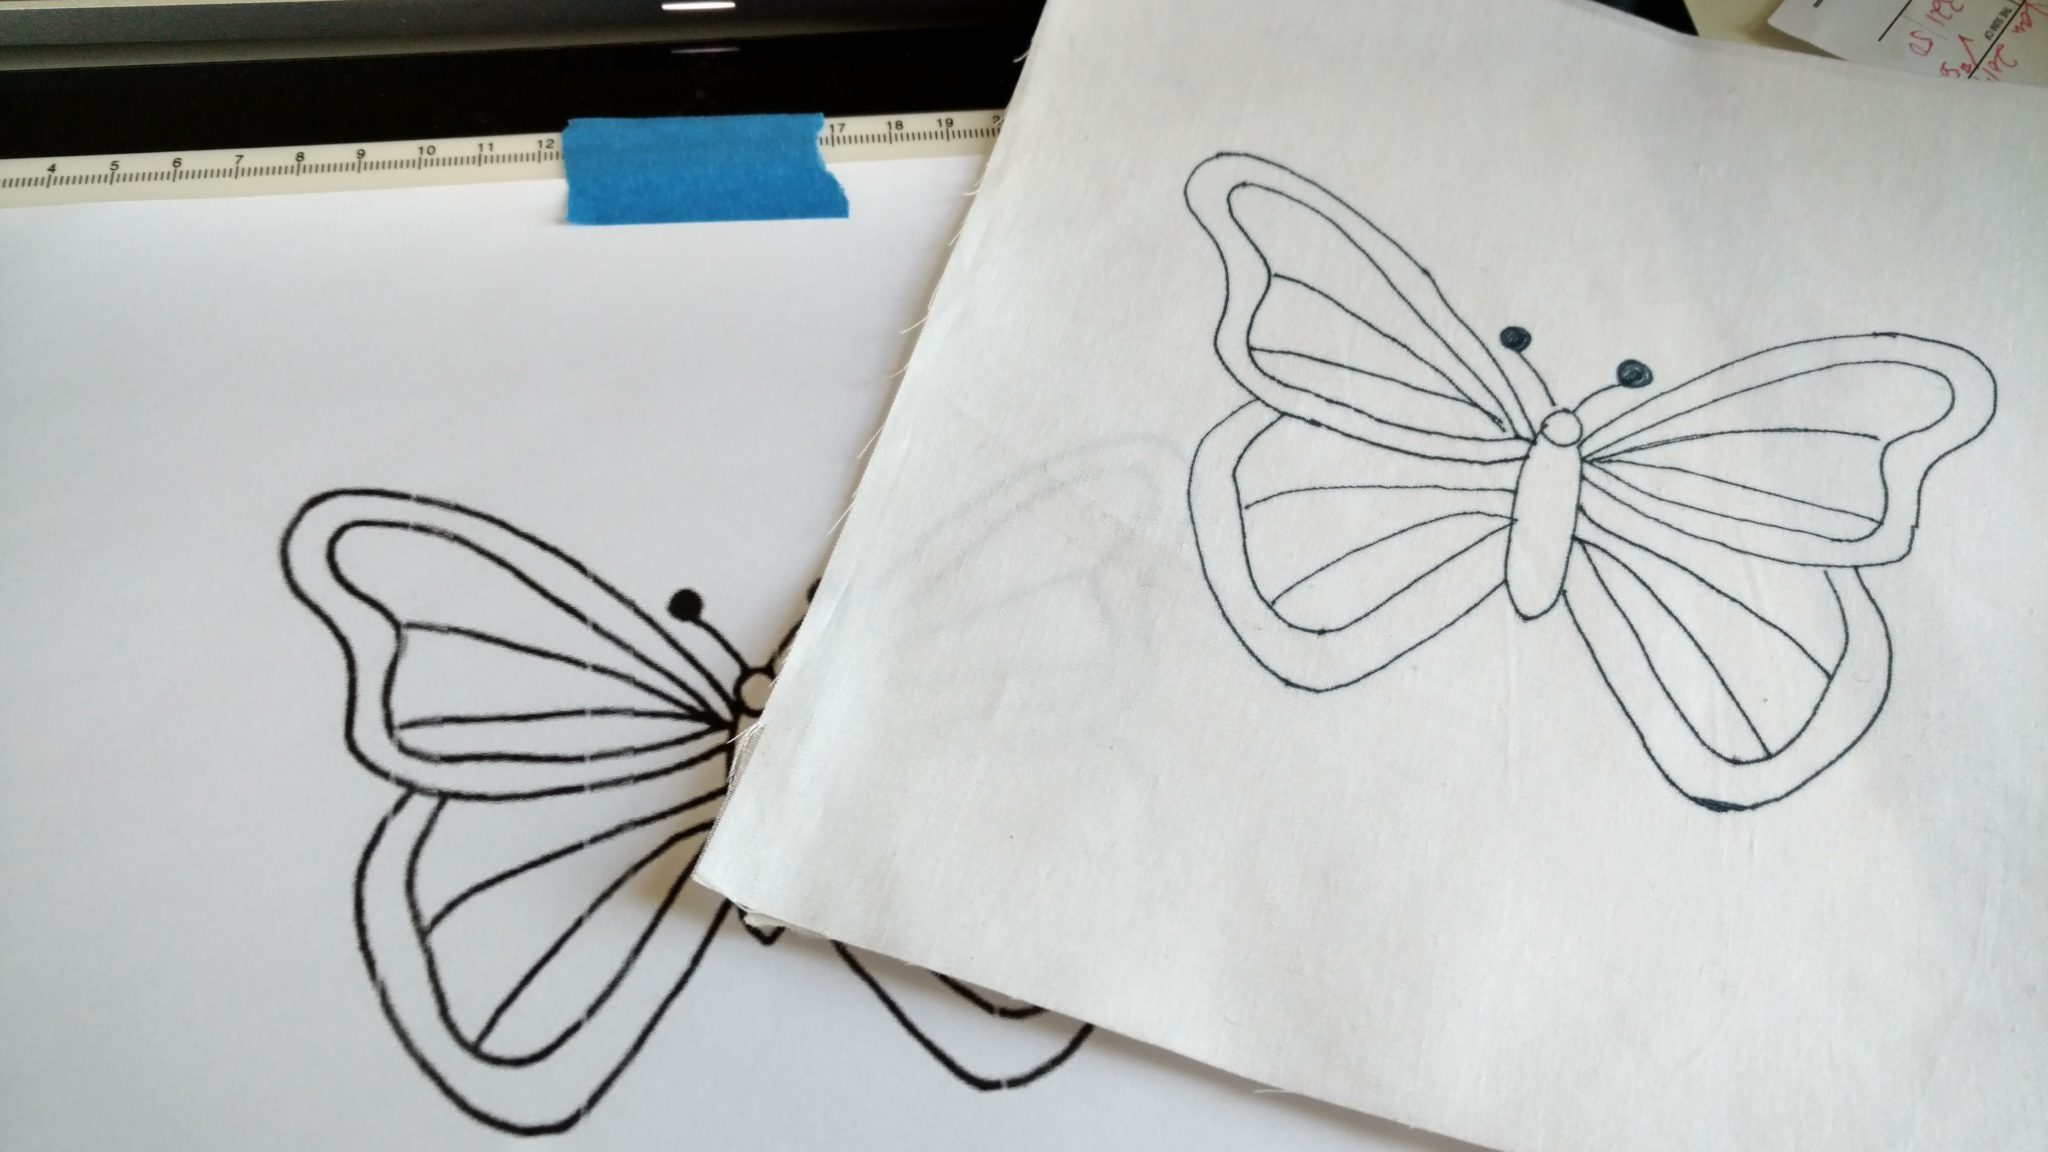
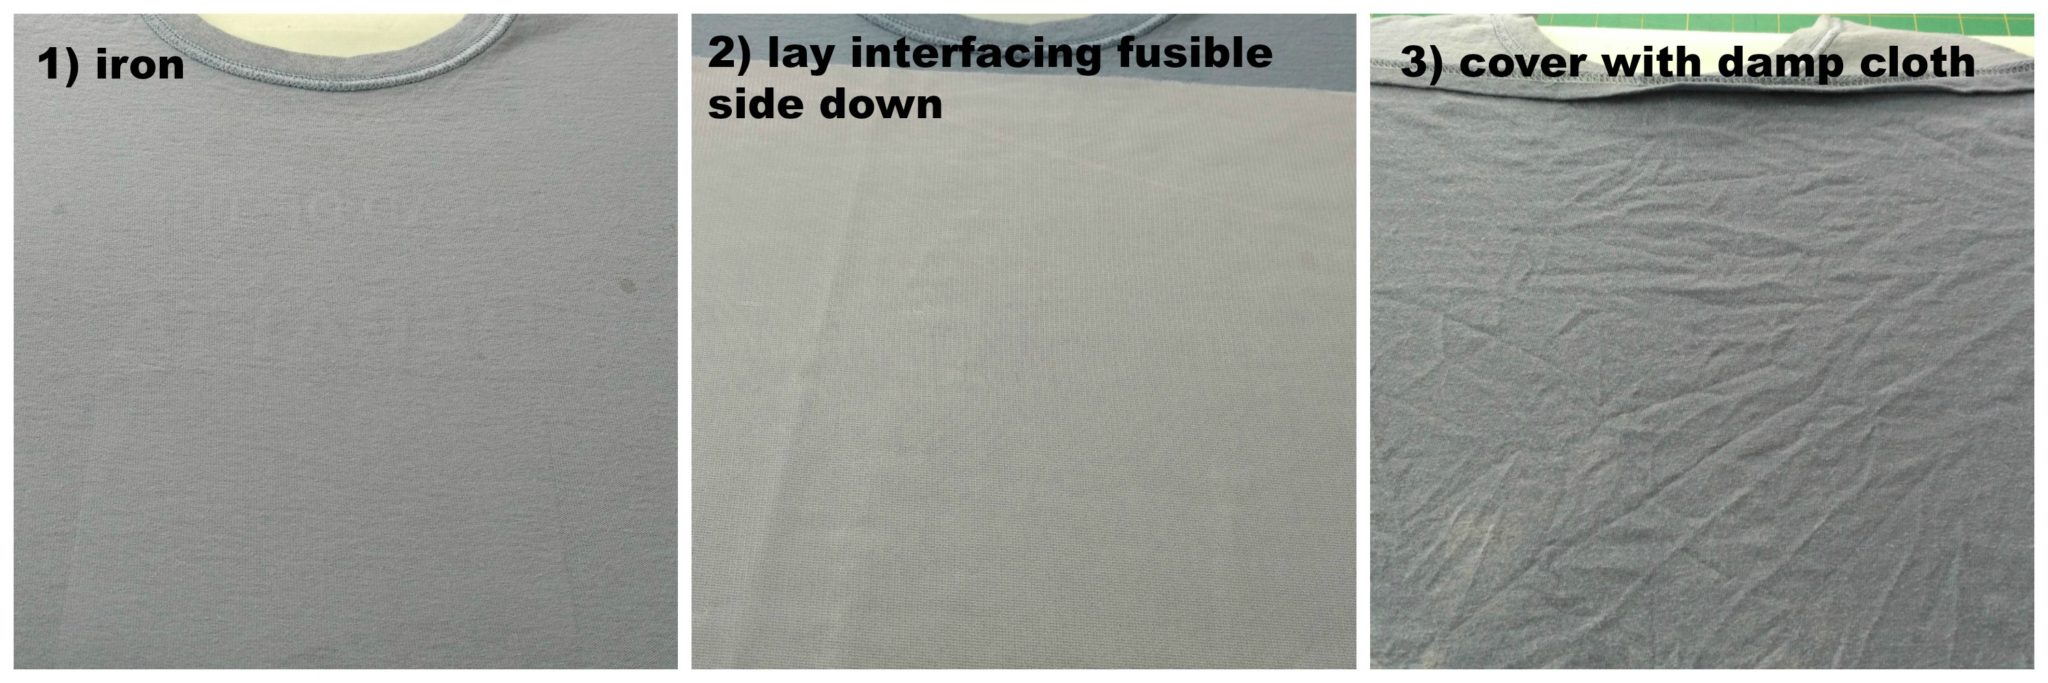
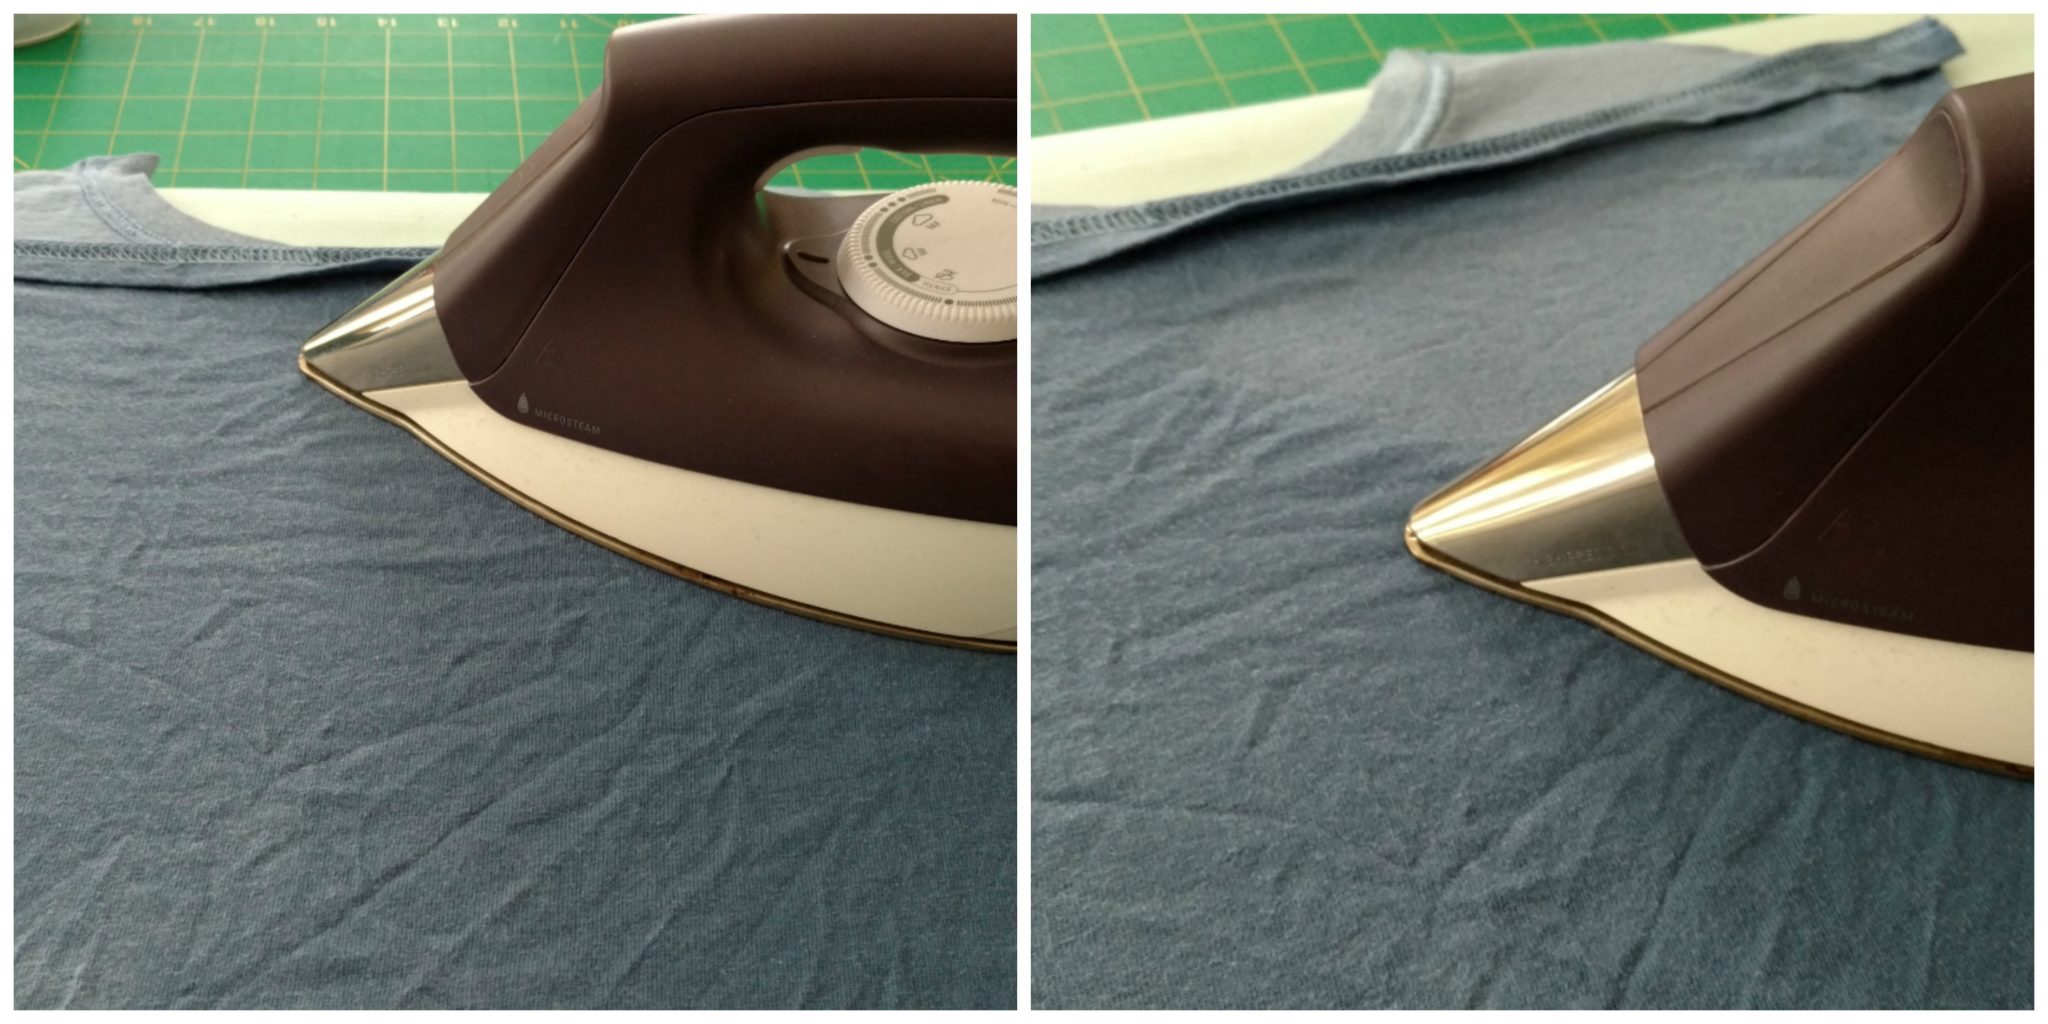
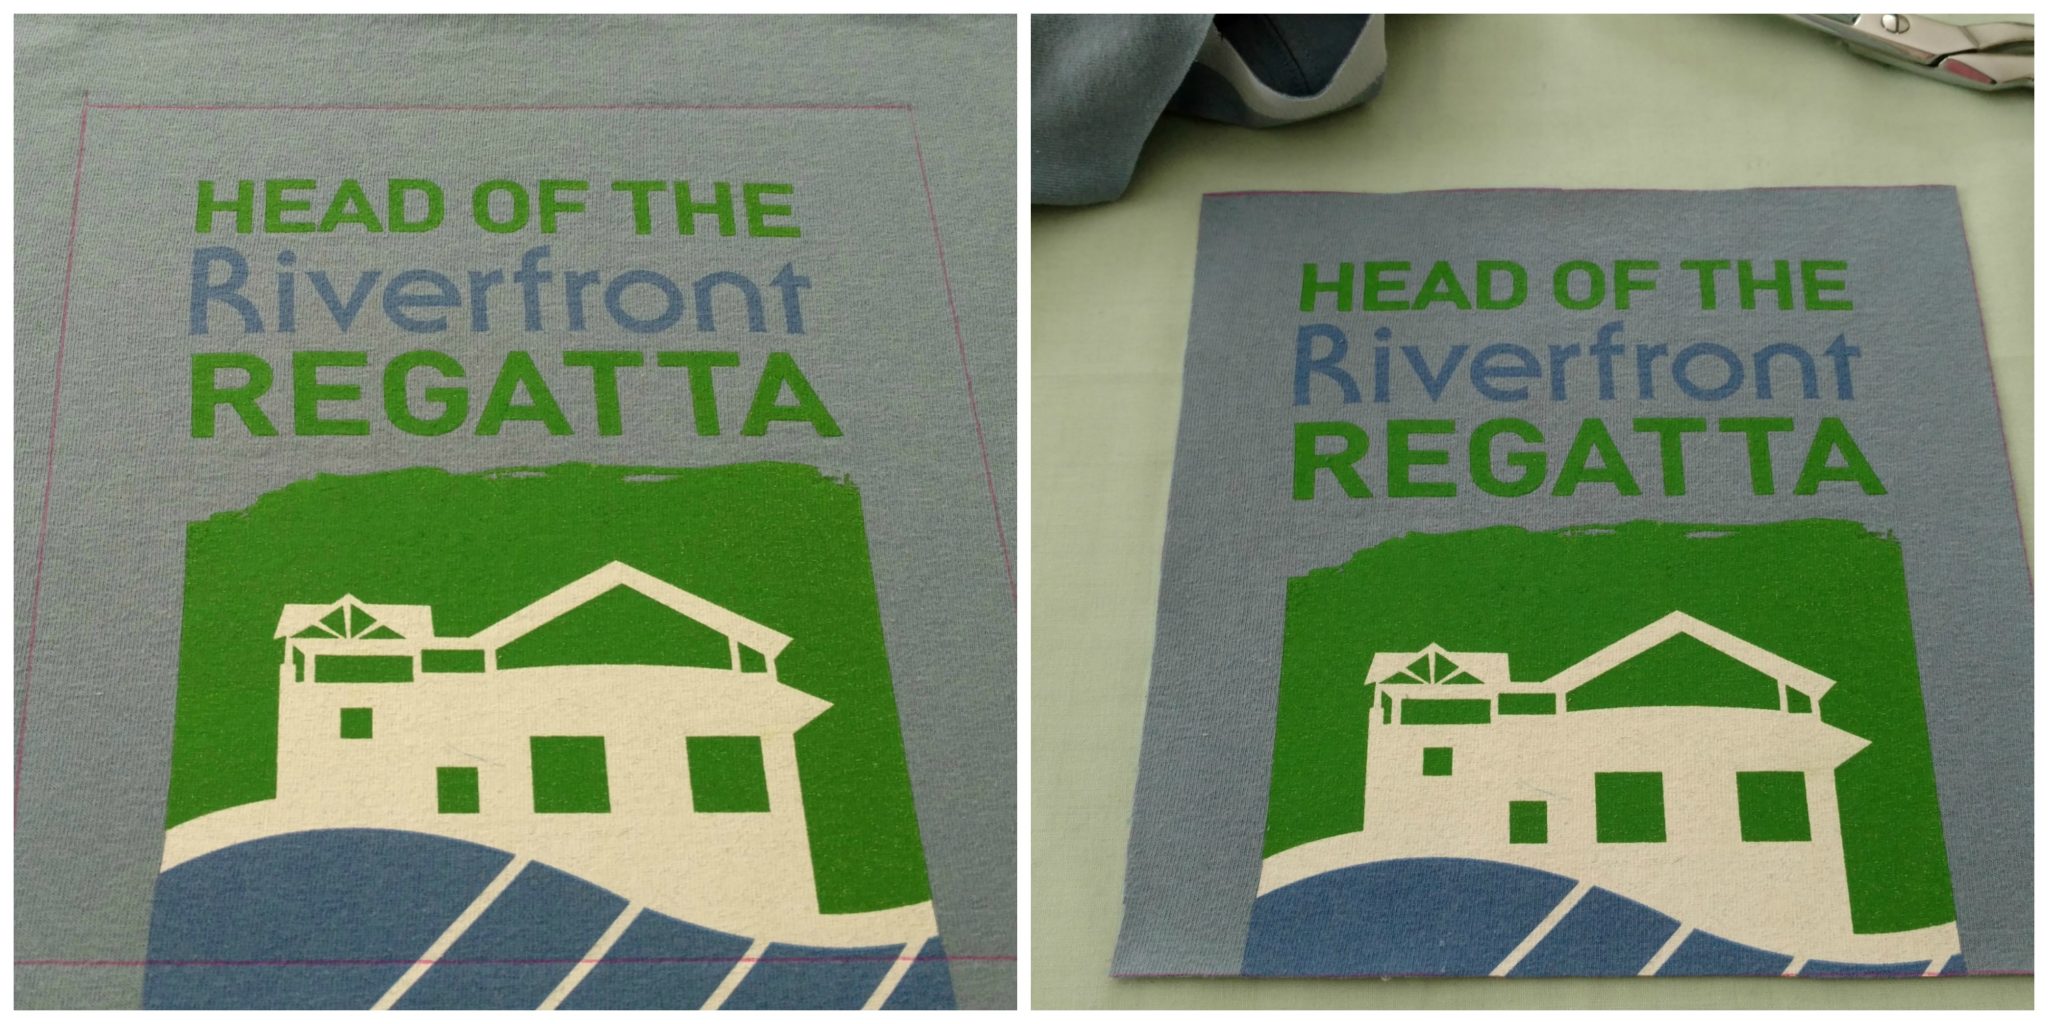
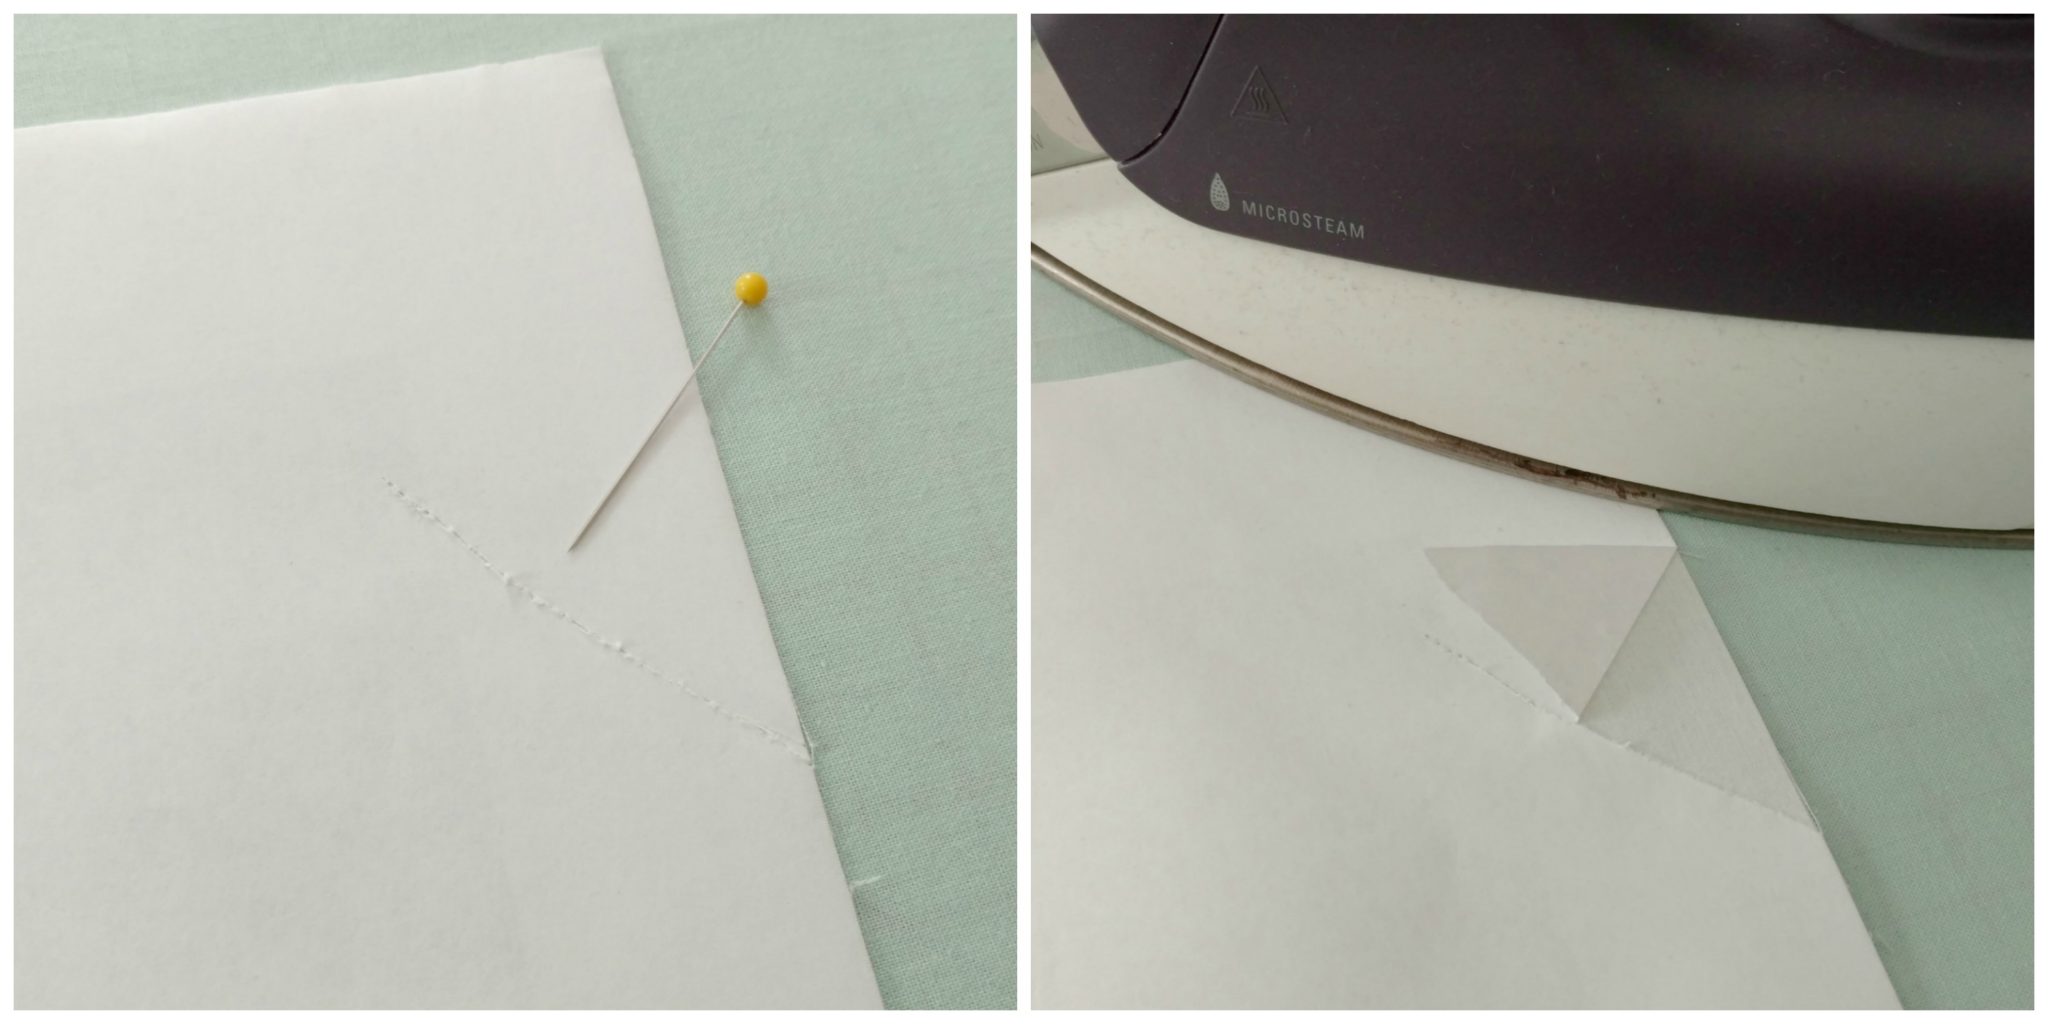
Start with the image you want to transfer.  Trace the shape onto the paper side of the fusible web. (TIP cut the fusible web smaller than your applique fabric  TIP cut a large piece of parchment paper and fold in half like a card.  Place your fabric and fusible web within the parchment card to protect your iron and ironing surface for excess adhesive) Iron onto the back of the fabric you are using for the applique.

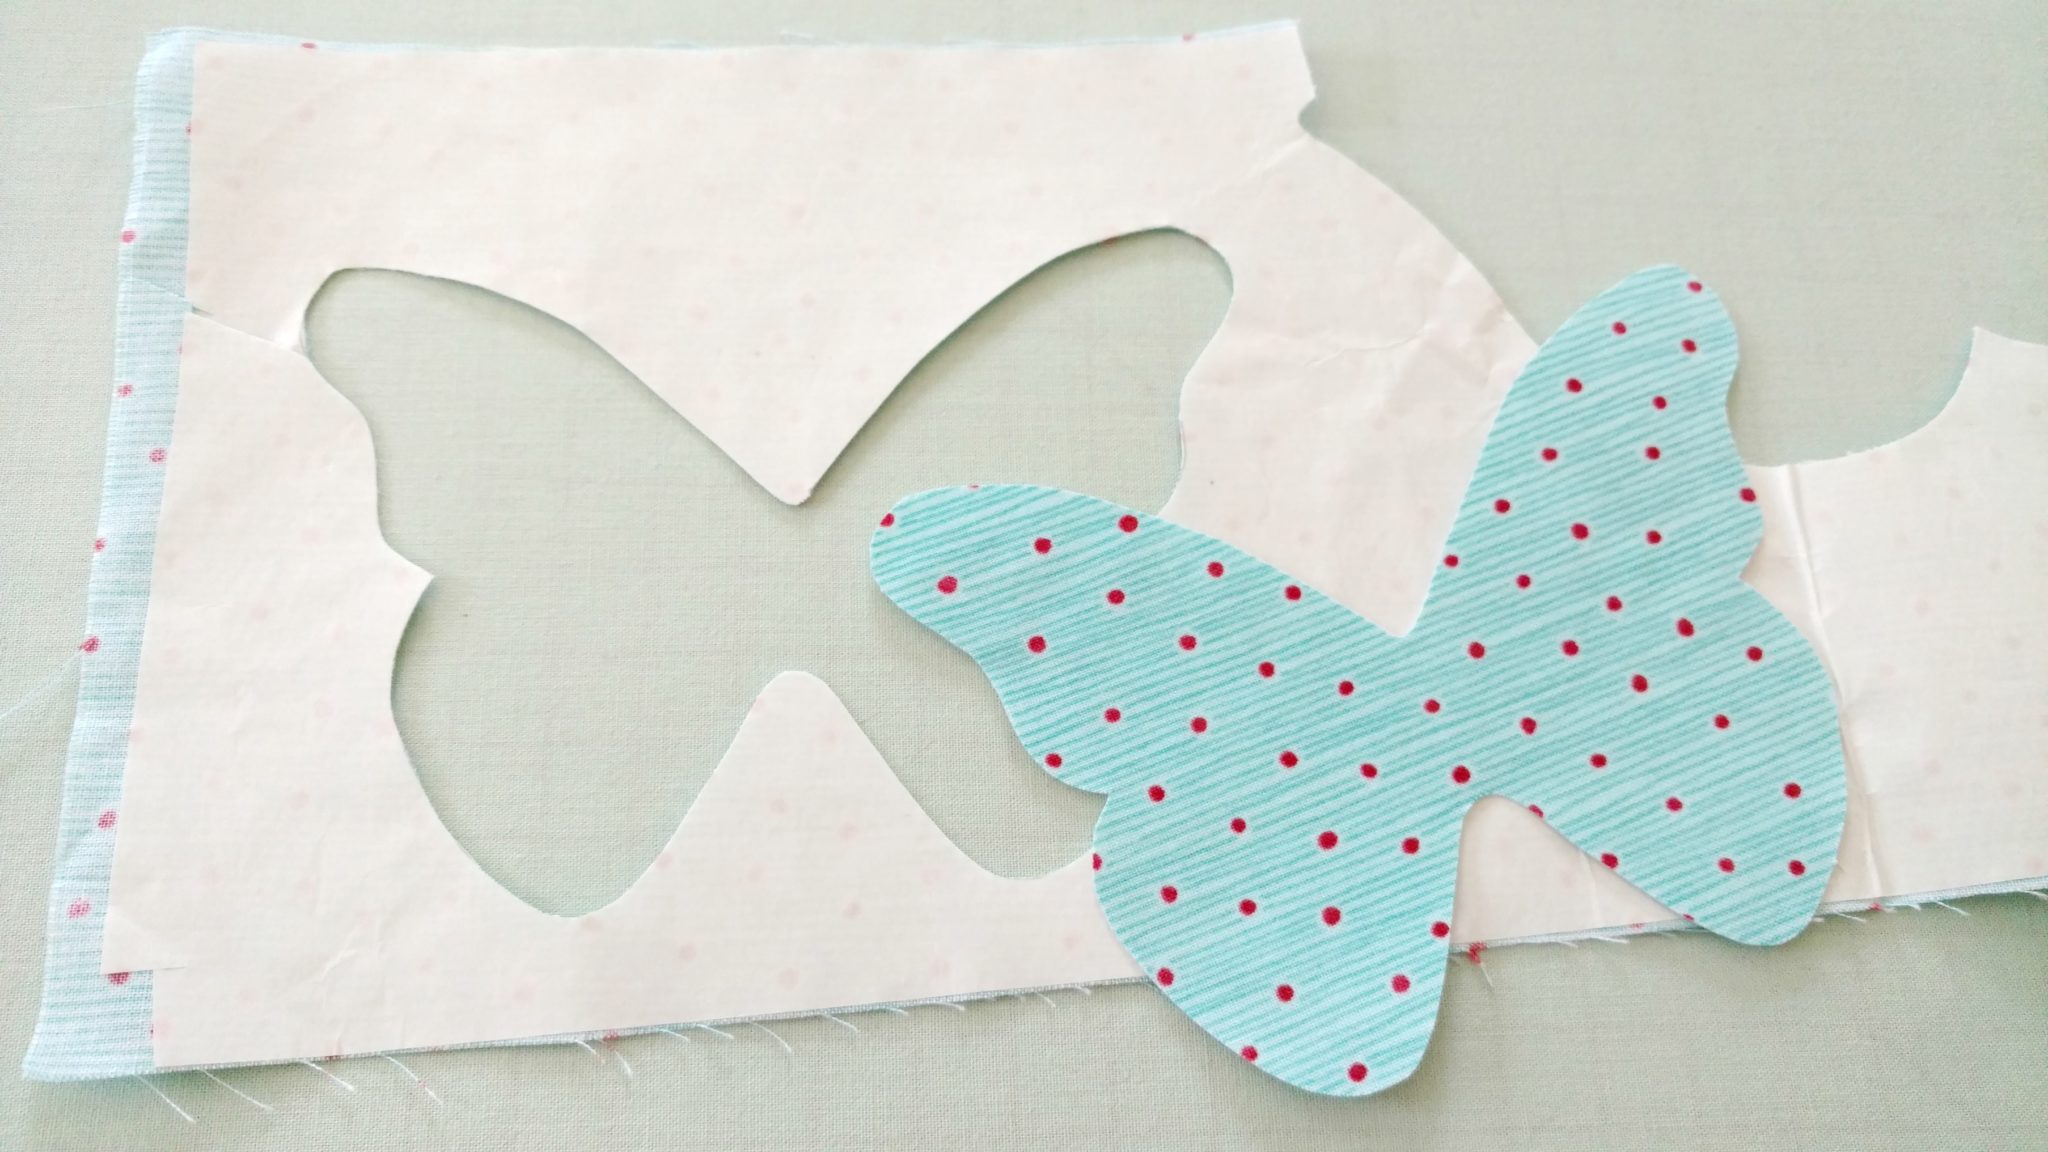
Carefully cut on your drawn line.  Peel away the paper backing on your applique and position on your background fabric.  TIP to remove paper backing either score with a pin or gently fold back an edge to separate the paper from the adhesive.

Place your background fabric with the applique in place within the parchment envelope.  Iron to affix to the background fabric.  If you are using the  Heat-n-BondULTRA Hold , you are now finished.

Filed Under: Watkinson School Memory Quilt

WATblock – preparing fabric for writing, drawing and image transfer

February 24, 2017 By Paola

Materials for fabric prep:

Freezer paper (from the grocery store)

Fabric

Iron and ironing surface

Freezer paper is often used in quilting.   It is used to stabilize the fabric, making it easy to write on the fabric without dragging or distorting the fibers.

Cut a piece of freezer paper slightly smaller than your fabric.  Iron fabric to remove all wrinkles.  Place fabric onto waxy side of freezer paper and iron together.  If you have any wrinkles just peel it back and iron again.


Image Transfer Materials:

artwork

fabric – prepared as per instructions above

marking tool (pencil, crayons, fabric markers Amazon affiliate link, archival pigment pens Amazon affiliate link)

masking tape

Lightbox, backlit device (tablet/phone), bright window, glass table or plastic box with pop light ply place it under your prepared fabric and check to see if you can see it through the fabric and freezer paper.  If you cannot, a light box comes in handy.  No light box, no problem!

Here are some great ways to improvise a light box for ease in transferring your design.

  • Use a bright window.  Tape your artwork and fabric onto a window and lightly trace using a pencil.
  • Use a glass table with a lamp placed underneath the table.
  • Use your tablet or phone as a light box.
  • Use a plastic tub/box turned upside down with a pop light underneath it

Filed Under: Watkinson School Memory Quilt

WATblock – simple tools and techniques for decorating blocks

February 24, 2017 By Paola

Materials:

prepared fabric (see post for preparing the fabric )

iron and ironing surface

fabric markers, crayons, embroidery floss, Pigma Micron pens, Frixion pens

press cloth (paper toweling, copy paper or scrap fabric)

Using crayons, I used Crayola Crayons

Color your image using crayons just as you would a coloring book.  With this technique, I will lightly trace the image with a pencil and go over it with an archival pen.  Next, I will use crayons to color it in.  I have had the best result with Crayola crayons as the color is nicely saturated.  Once it is completed, cover your block with a press cloth (either a piece of paper toweling, plain copy paper or a scrap of fabric).  Iron your block with a hot dry iron.  This will melt and lift the excess wax from the block and deposit it onto your press cloth.

Using fabric markers: 

I traced the hands directly using fabric markers.  Many are available, pictured are Crayola Fabric Markers Amazon affiliate link and Tulip Fabric Markers Amazon affiliate link

using embroidery floss

I traced the hands using a Pilot Frixion Pen Amazon affiliate link The markings from this pen with disappear with the heat of an iron.  Then I embroidered with floss using a stem stitch.

using Pigma Micron pens, available in several colors and different thicknesses including brush tip

brush tip Amazon affiliate link  medium .05 tip and thin .01 tip Amazon affiliate link

Filed Under: Watkinson School Memory Quilt

WATblock – T-shirt block

February 22, 2017 By Paola

Class of 2017, the block size needed is 8.5″ x 8.5″

This is what you will need to make a quilt block using a t-shirt.

  • A clean t-shirt
  • damp press cloth
  • non-woven fusible interfacing (I am using Pellon Ek130Easy-Knit.  Available by the yard at fabric/craft stores) cut a piece larger than the area you will be using as your quilt block
  • scissors or rotary cutter and mat
  • pencil with a dull tip (I am using a Frixion pen, the markings are erased with the heat of an iron Amazon affiliate link )
  • ruler or template
  • iron set to Wool/Silk with steam
  • ironing surface


The first step in preparing your t-shirt will be to cut off the sleeves.  Then cut across the shoulders and down the sides separating the front from the back.

Discard the sleeves. If the back is not printed with a graphic, set it aside.

1) Turn the front of the t-shirt over and give it a press with an iron set to Wool/Silk w/steam.

If the back of the t-shirt doesn’t have any graphics, it can be used as a press cloth.  To dampen it, wet your hands and use the T to dry them.  Repeat this step until the T is sufficiently dampened, similar to a wet dish towel.

2)  Place your interfacing glue side down onto the back of the ironed T-shirt.  TIP The glue side of the interfacing is rough with bumps.  TIP T-shirts stretch more side to side than they do the top to bottom.  Lay the interfacing with it’s the stretch going opposite to that of the T-shirt. To determine the stretch of each, simply tug the edges side to side and top to bottom to determine which direction has more stretch. This is a really important process because the WATquilt hangs for an entire year.  The interfacing stabilizes the T-shirt fabric which prevents it from stretching and curling during the quilt construction and also helps to keep it from sagging once finished.  It’s even more important if the block will be embellished in any way.

3)  Now cover the interfacing and T-shirt with the damp T-shirt or press cloth

BE SURE TO READ THE MANUFACTURES INSTRUCTIONS FOR THE INTERFACING YOU ARE USING.  My instructions say to set my iron to the wool/silk setting with steam and to press each spot for 10 seconds.  Lay the iron straight down and hold for the recommended time. Lift straight up and move the iron to the side with a slight overlap.  DO NOT SLIDE IRON BACK AND FORTH, LIFT UP AND DOWN.  My press cloth was almost dry by the time I ironed the entire surface.

Remove the pressing cloth and allow the T-shirt to cool.  Then turn it over and mark the size of your block. Class of 2017, you will be cutting an 8.5″ x 8.5″ square.  Carefully cut out your block using either scissors or a rotary cutter and mat.  All done!


Filed Under: Watkinson School Memory Quilt

WATblock- printing photos on fabric

February 22, 2017 By Paola

Class of 2017, the quilt block you will be making needs measure 8.5”x8.5” square.  This measurement includes a seam allowance of a quarter inch all the way around.

The product I’ve found that works best with this process is called Printed Treasures by Dritz.  It can be found in big box fabric stores, quilt shops and on-line.  Amazon affiliate link

I really like this particular brand because the fabric is smooth and the resulting images are clear and crisp.  It can only be used on an ink jet printer, NOT laser or commercial printers such as those found in copy centers.  The package provides very clear instructions.

Starting with your image, make sure it is a good shot.  If needed, make adjustments in your photo editing software and save.   Keep in mind, quality photo equals quality print.

This is how I do it.

I’ve selected the photo I’d like to use on my computer and hit print.  Shown below are the changes I made in my print options:

Orientation: portrait

Paper size:  8”x 10”

Paper type:  PLAIN PAPER, be sure to make this selection

Photo size: I’ve selected 8”x 10”, but you may print a different size.  Just keep in mind that you will be cutting the fabric sheet to 8.5” x 8.5”

Under “more settings”

Paper and quality, output quality: CHANGE TO BEST PHOTO, click OK

Print.  Do not touch, allow to dry, cut to size and remove the paper on the back.  See tip below for paper removal

TIPS

I like to be sure that I have plenty of ink in my cartridges.

Be sure to load the sheet so that the image prints on the fabric side.  I remove the regular paper from my feed tray and only put in one sheet of the fabric paper at a time.

Before printing actual photo I run a fabric test sheet through my printer.  I call it the “cleaner sheet”.  I’ll either print a document that says TEST or I will photocopy a handwritten doc that says TEST.  I like to do this process because I’ve found that it helps pick up any stray ink that may be on the print rollers.  I will then save this test print for future printings.

DO NOT TOUCH!  allow the ink to dry for a few minutes.

To remove the paper, I will score the paper on the back with a pin.  Then iron the paper side to loosen the hold and peel back from the scored edge.  I’ve found it does not want to come off without being heated.

Trim to 8.5″ x 8.5″ and you are done.

Filed Under: Watkinson School Memory Quilt

WATblock – Senior Memory Quilt Project

February 20, 2017 By Paola

Hello Watkinson parents!

My name is Paola Dumeer and I am overseeing the construction of the 2017 class memory quilt.  I am here to help and look forward to working with you.

A memory quilt is a wonderful keepsake.  It is constructed in the typical fashion of making a quilt.  Various fabrics are arranged, sewn together and ironed flat to form the front known as the quilt top.  It is set on top of a layer of batting then backed with another piece of fabric.  The process of attaching all three layers together is called the quilting.

When constructing a memory quilt, the process above is completed before any embellishment takes place.  What has become challenging with our Watkinson quilt, is that the construction has to happen with all the embellishing already complete.  This can make the sewing and need to iron very difficult.  Please keep this in mind when working on your quilt block, and be sure to use items that are appropriate for textiles and sewing.  Items such as buttons, beads, trims or any other appliqued items are fine as long as they are kept closer to the center. They should be heat proof.

I will be posting short written tutorials that I hope you will find helpful while working on your quilt blocks.  I will also detail the materials I often use, with links to help you find them.  Please feel free to reach out to me if you’d like assistance on a particular design idea.

Lastly, please note the required size quilt block this year will be 8.5″ x 8.5″.  Please remember to keep your designs within a 1/4″ from all sides.

Let’s get started!

Paola

paola@vineyardthimble.com


Filed Under: Watkinson School Memory Quilt

Welcome to Vineyard Thimble, Sewing & Embroidery

October 29, 2013 By Paola

Custom Embroidery Services in Glastonbury, Connecticut.

Filed Under: Potpourri

Recent Posts

  • WATblock – using iron-on adhesive for no-sew project
  • WATblock – preparing fabric for writing, drawing and image transfer
  • WATblock – simple tools and techniques for decorating blocks
  • WATblock – T-shirt block
  • WATblock- printing photos on fabric

Blog Topics

  • Potpourri
  • Watkinson School Memory Quilt

Custom Items

If you don't see what you're looking for in the shop, please contact me and let me know your thoughts for that perfect gift item.
 

Contact Me

Customer Service

Information and FAQs

  • Thread Choices

Follow Me

  • Facebook
  • Instagram
  • Pinterest
Copyright © 2023 Vineyard Thimble