Class of 2017, the quilt block you will be making needs measure 8.5”x8.5” square. This measurement includes a seam allowance of a quarter inch all the way around.
The product I’ve found that works best with this process is called Printed Treasures by Dritz. It can be found in big box fabric stores, quilt shops and on-line. Amazon affiliate link
I really like this particular brand because the fabric is smooth and the resulting images are clear and crisp. It can only be used on an ink jet printer, NOT laser or commercial printers such as those found in copy centers. The package provides very clear instructions.
Starting with your image, make sure it is a good shot. If needed, make adjustments in your photo editing software and save. Keep in mind, quality photo equals quality print.
This is how I do it.
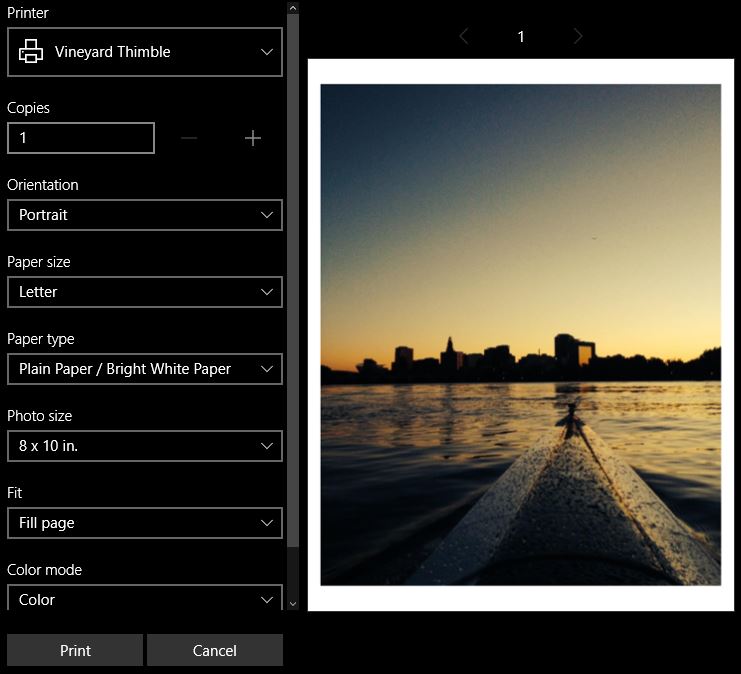
I’ve selected the photo I’d like to use on my computer and hit print. Shown below are the changes I made in my print options:
Orientation: portrait
Paper size: 8”x 10”
Paper type: PLAIN PAPER, be sure to make this selection
Photo size: I’ve selected 8”x 10”, but you may print a different size. Just keep in mind that you will be cutting the fabric sheet to 8.5” x 8.5”
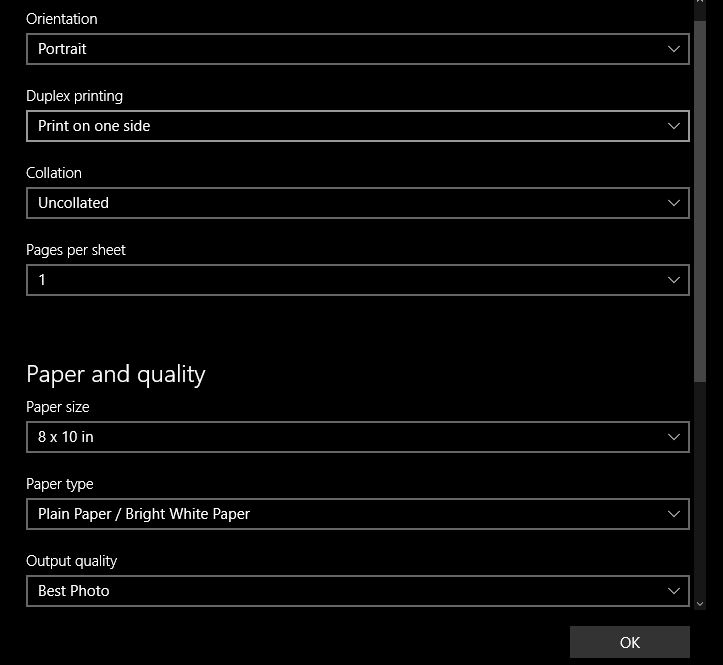
Under “more settings”
Paper and quality, output quality: CHANGE TO BEST PHOTO, click OK
Print. Do not touch, allow to dry, cut to size and remove the paper on the back. See tip below for paper removal
TIPS
I like to be sure that I have plenty of ink in my cartridges.
Be sure to load the sheet so that the image prints on the fabric side. I remove the regular paper from my feed tray and only put in one sheet of the fabric paper at a time.
Before printing actual photo I run a fabric test sheet through my printer. I call it the “cleaner sheet”. I’ll either print a document that says TEST or I will photocopy a handwritten doc that says TEST. I like to do this process because I’ve found that it helps pick up any stray ink that may be on the print rollers. I will then save this test print for future printings.
DO NOT TOUCH! allow the ink to dry for a few minutes.
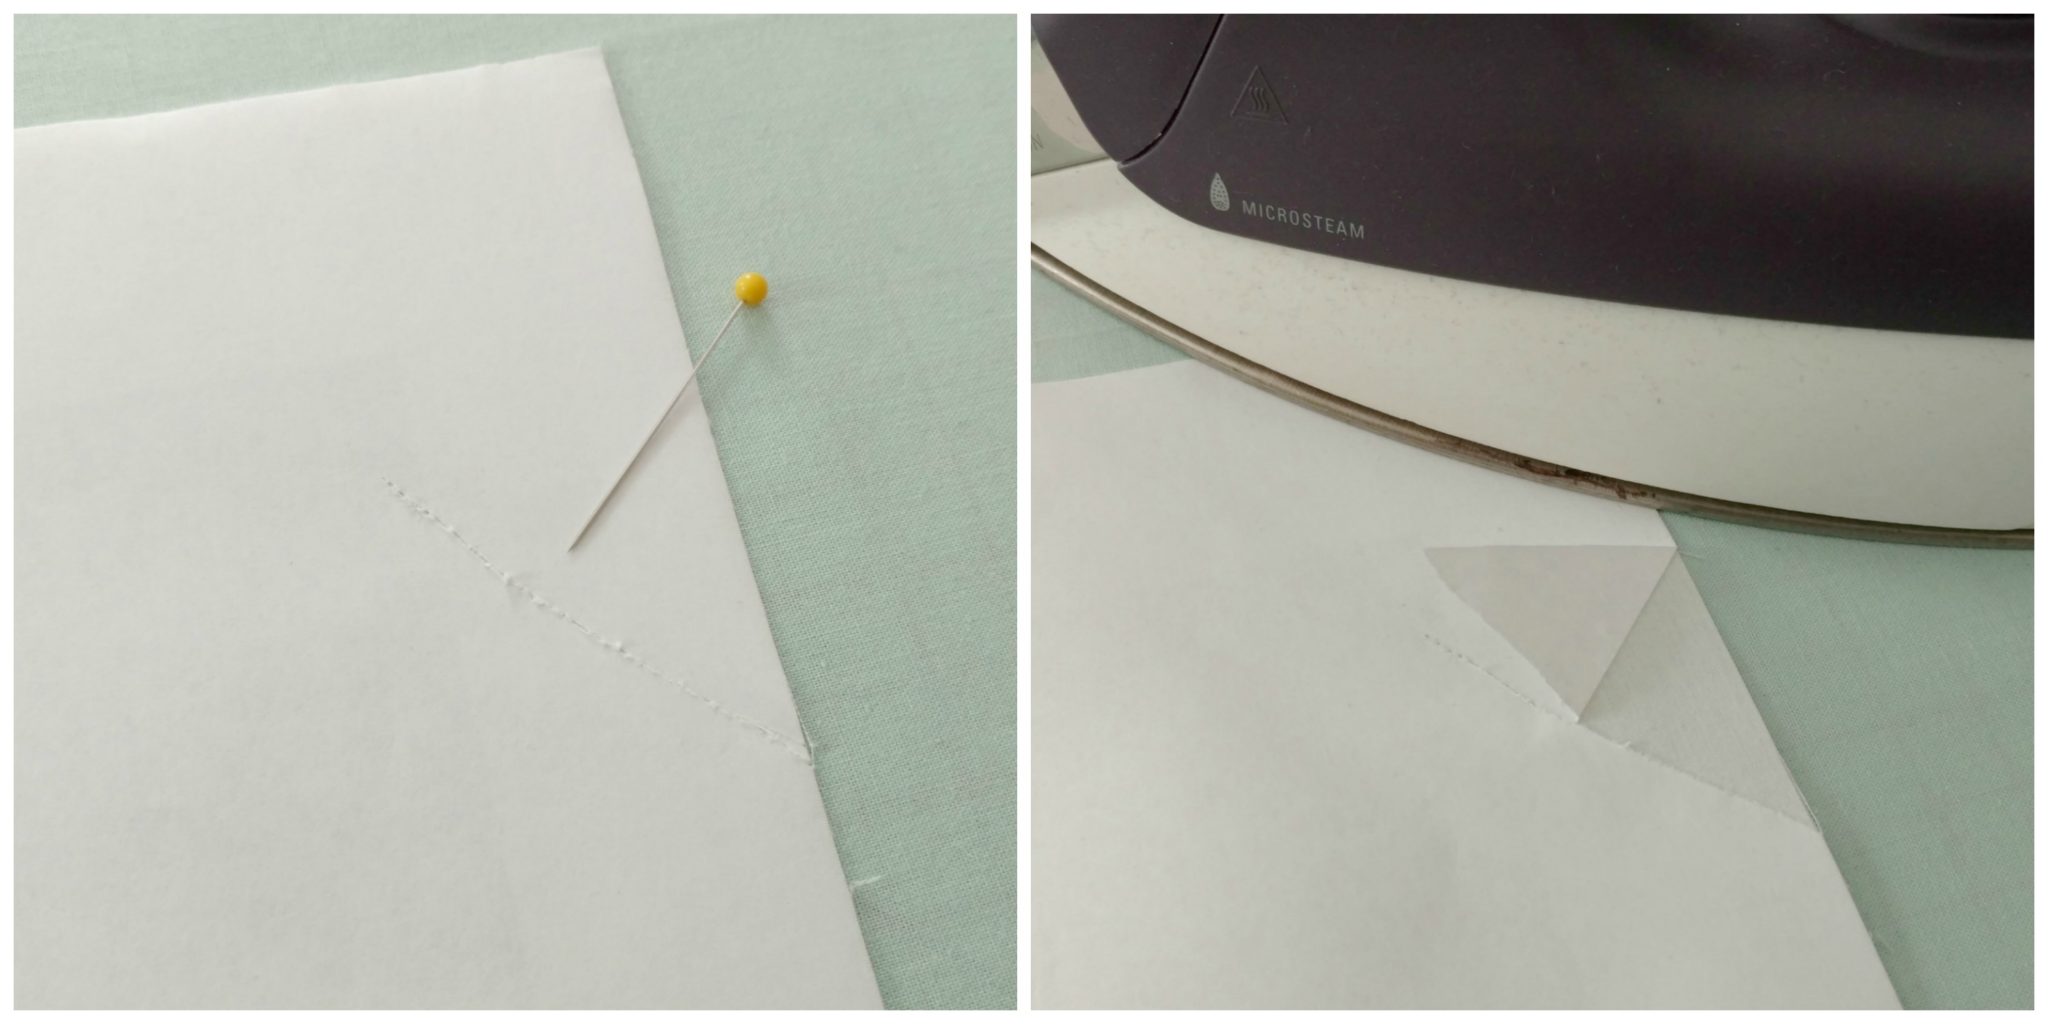
To remove the paper, I will score the paper on the back with a pin. Then iron the paper side to loosen the hold and peel back from the scored edge. I’ve found it does not want to come off without being heated.
Trim to 8.5″ x 8.5″ and you are done.
